V2.4 CBT Wiring Guide
This page covers the wiring specific to the V2.4 printer. Please also review the General Wiring Guide for information common to both the V2.4 and the Trident (Stealthburner, Disco LEDs, etc).
Before You Start
Make sure the 110V/230V switch on your LRS-200-24 power supply is in the right orientation.
We strongly recommend you flash the M8P/SB2209 before you install them. This usually saves you 2 hours or more of work. Check this page if you have a Manta M8P V2, or this page if you have a Manta M8P V1. Note that the kits have been shipping with V2 since late fall of 20223.
Z Chain:
300mm = 25 links, 350mm = 28 links.
You may have to remove a few links according to your build size.
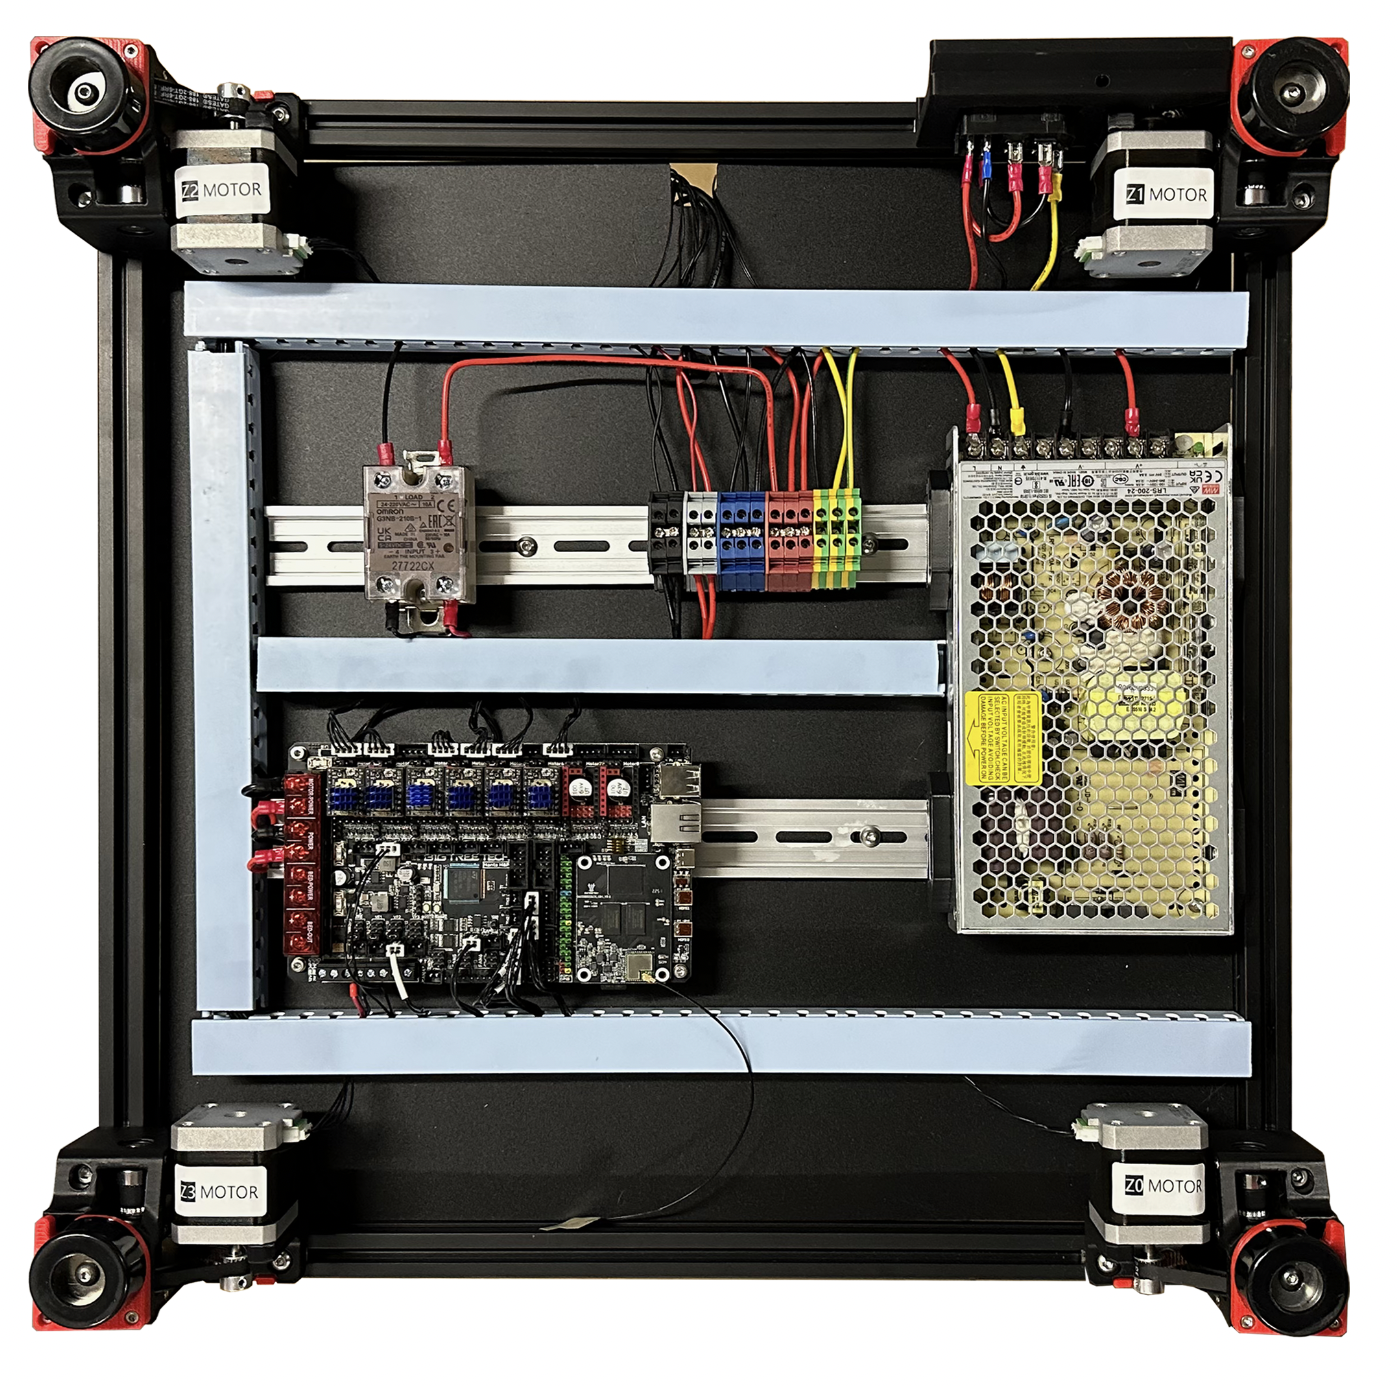
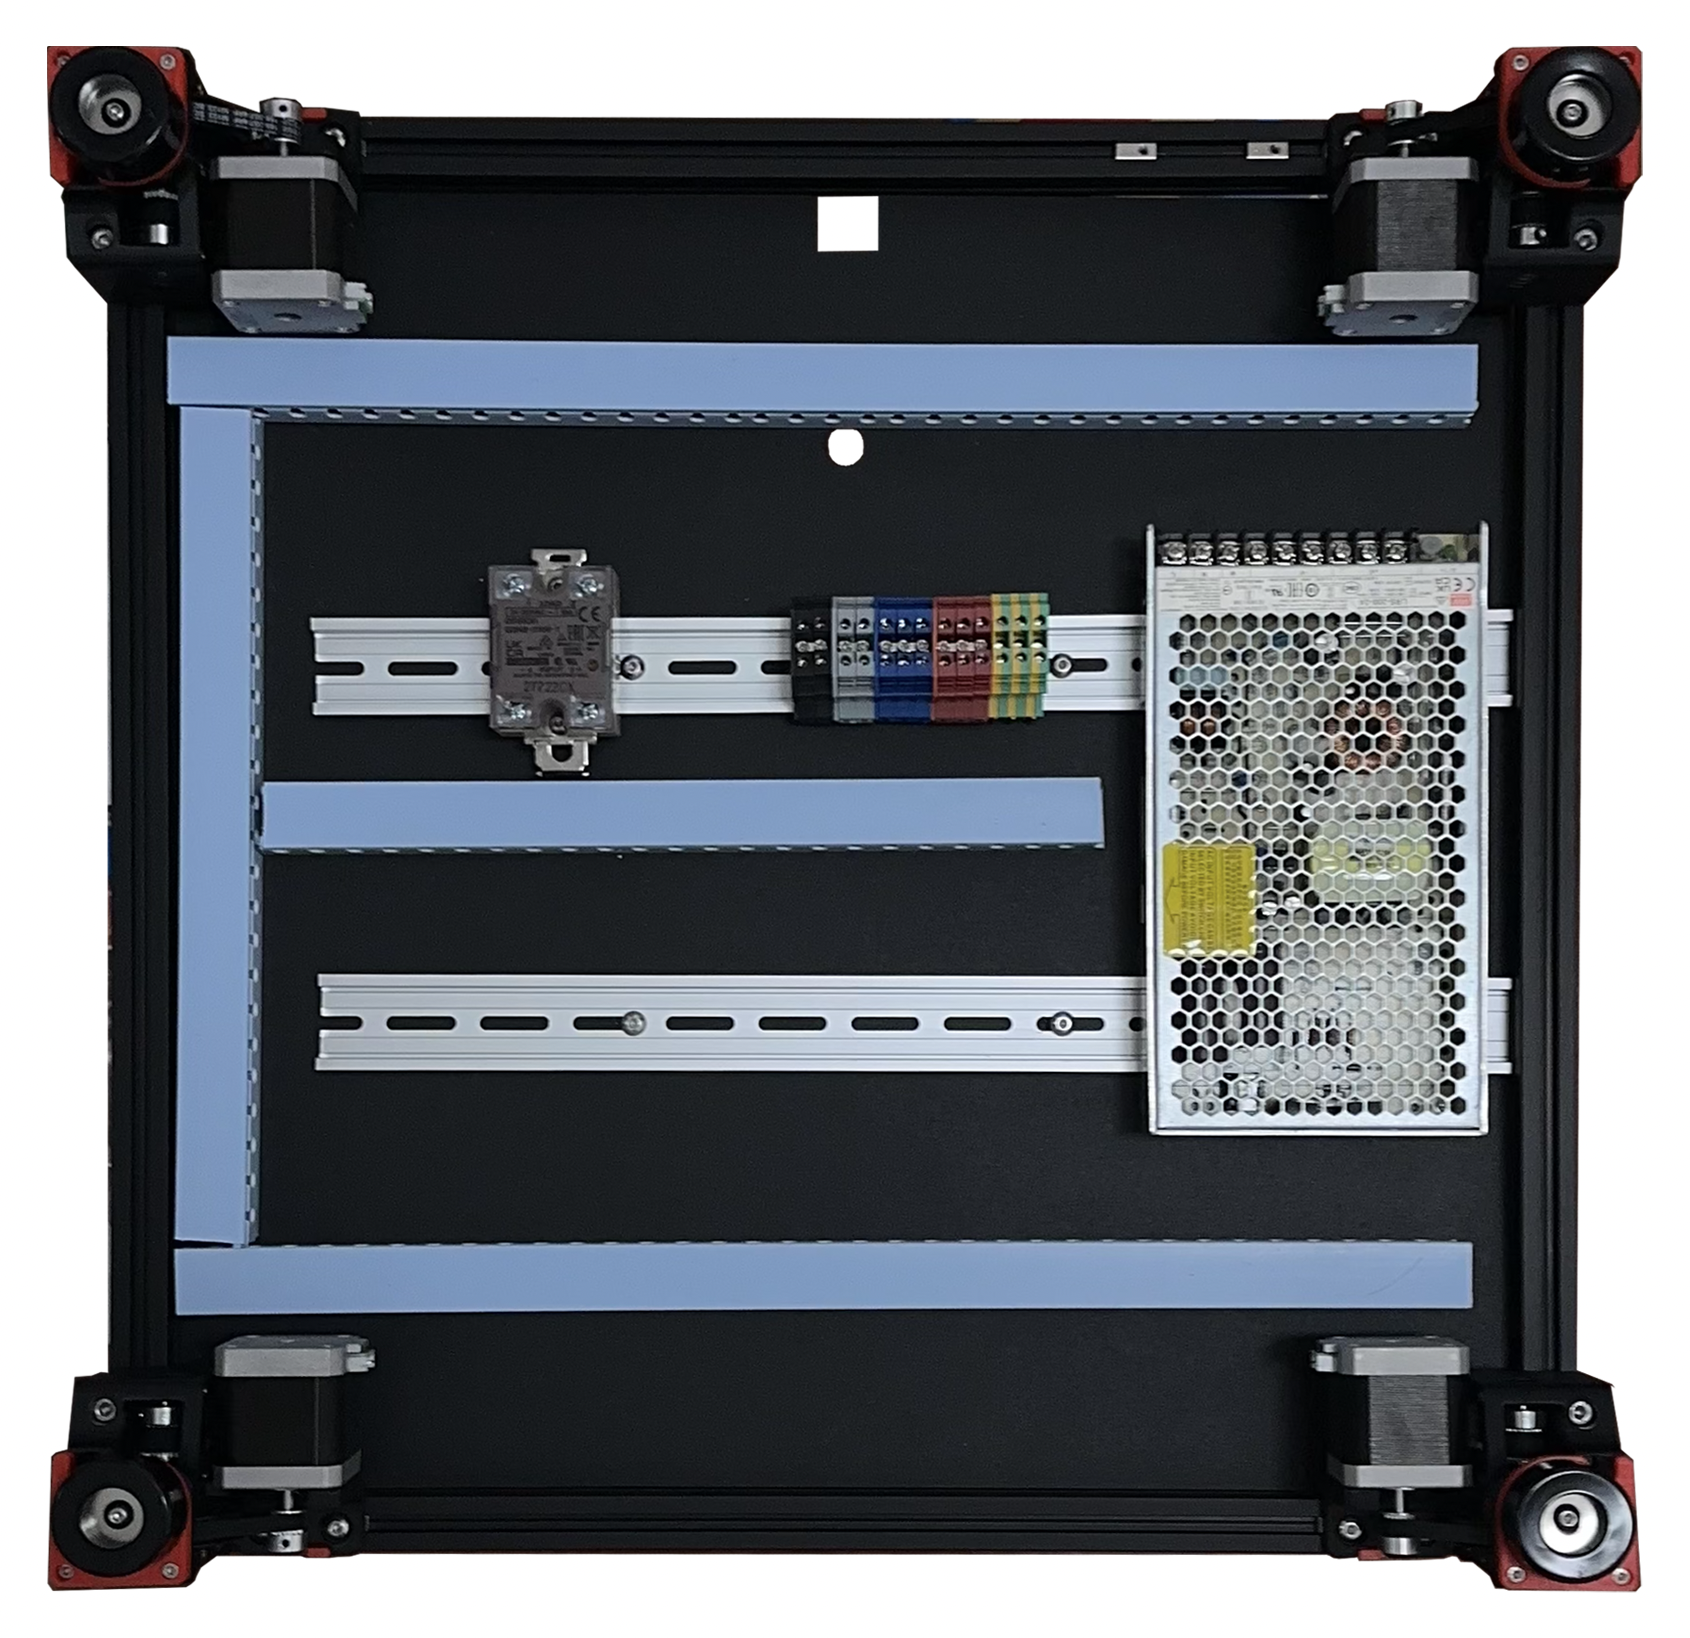
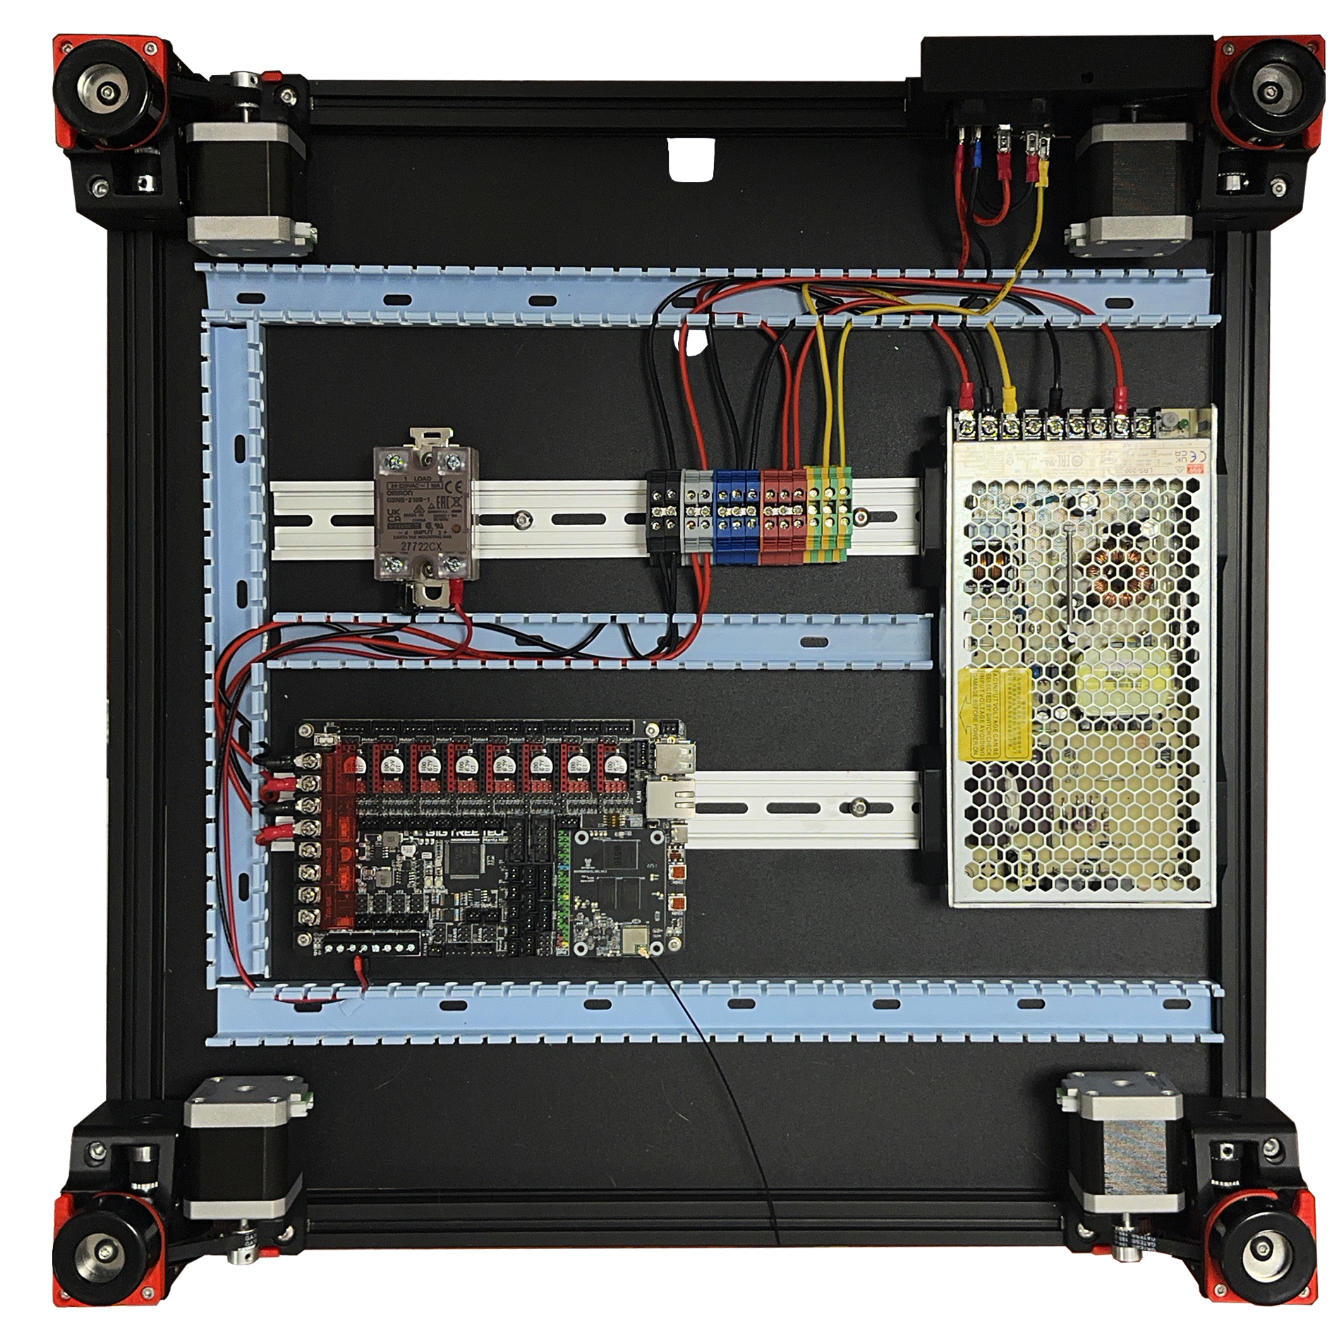
Layout
Use 3M 5952 Tape to mount the PVC trunkings. We recommend you clean the area to be bonded with IPA (Isopropyl Alcohol) to ensure good adhesion.
Our PSU mounting is different from the official Voron one. Please refer to the Print Guide for instructions.
Note the orientation of the Solid State Relay (SSR). It has an AC side and a DC side. You must be extremely careful that you don't wire the SSR the wrong way around or you will damage it and, potentially, other parts of the printer as well.
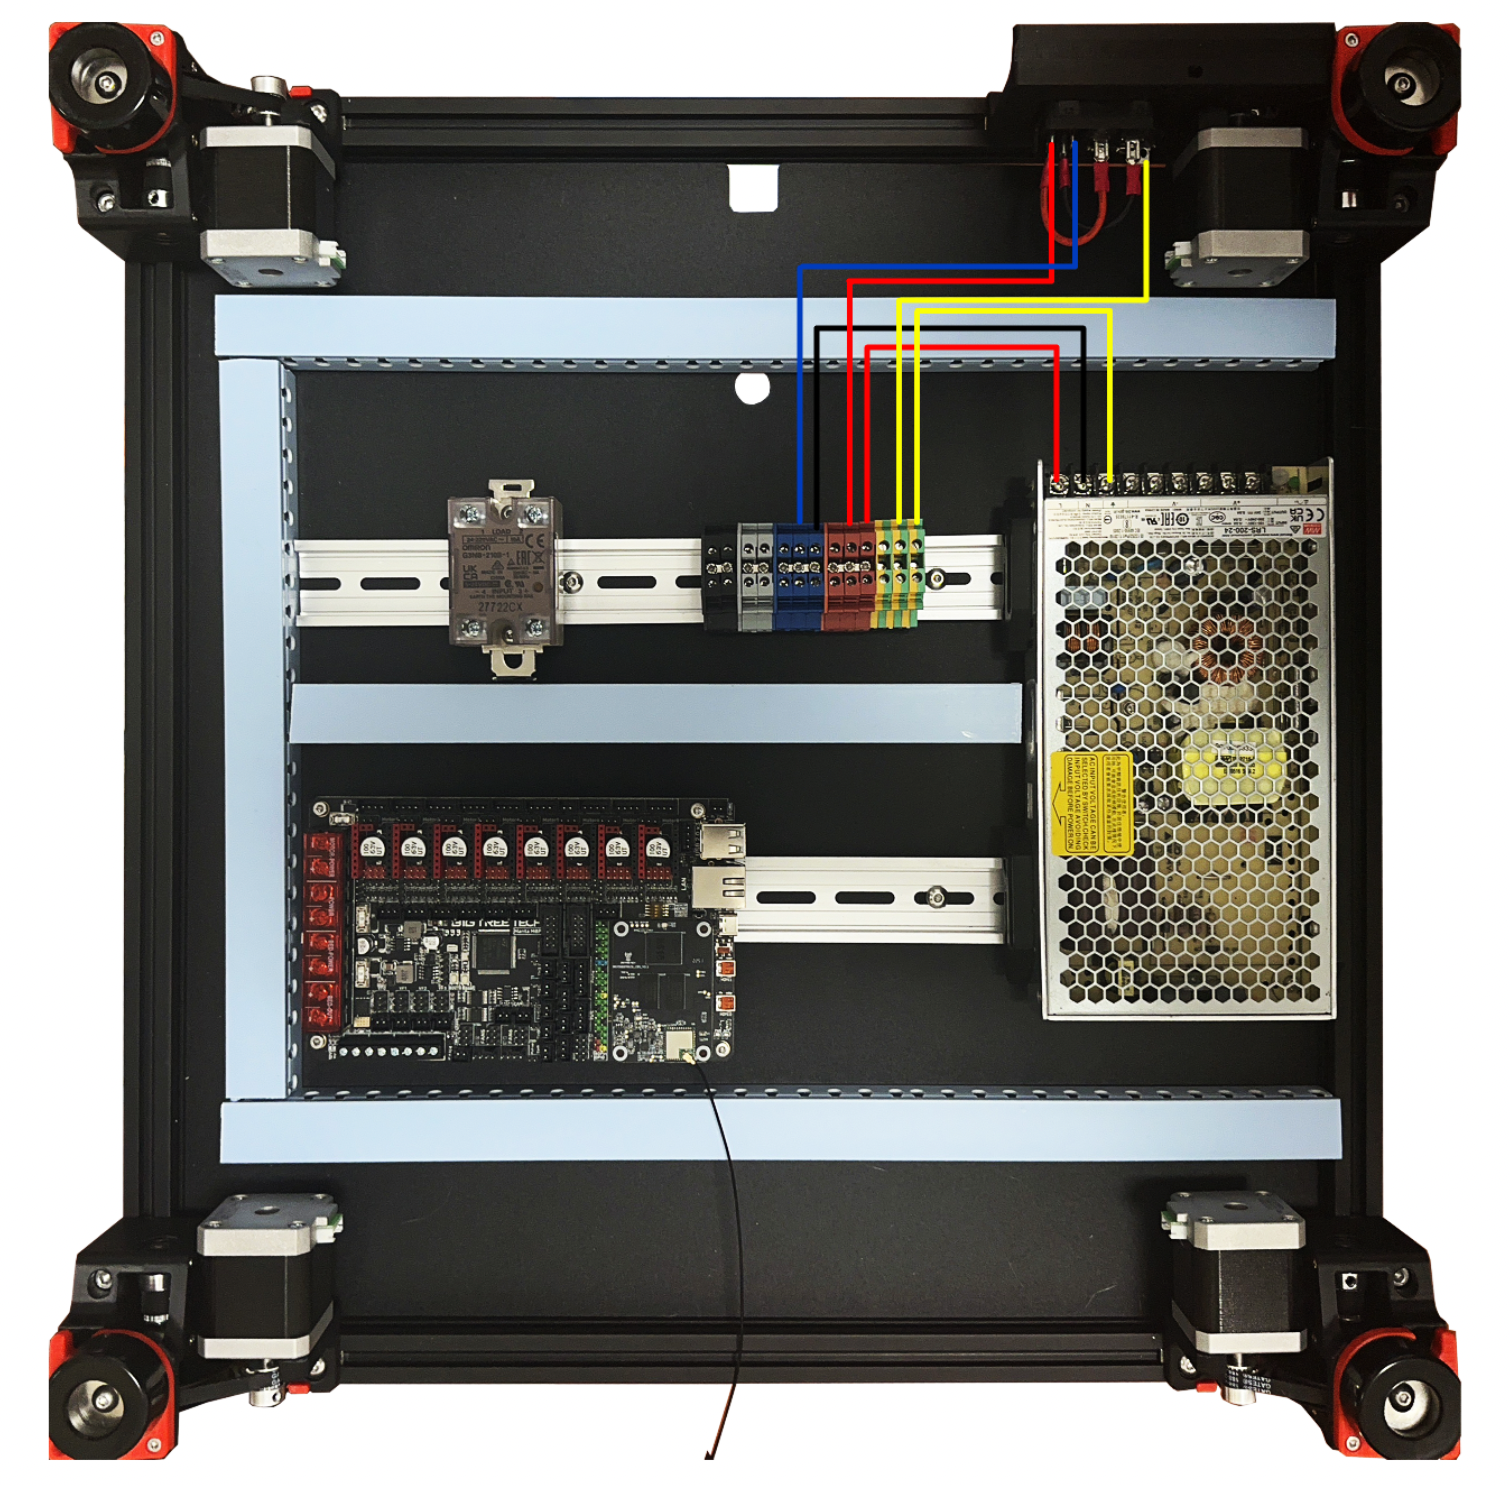
AC Wiring
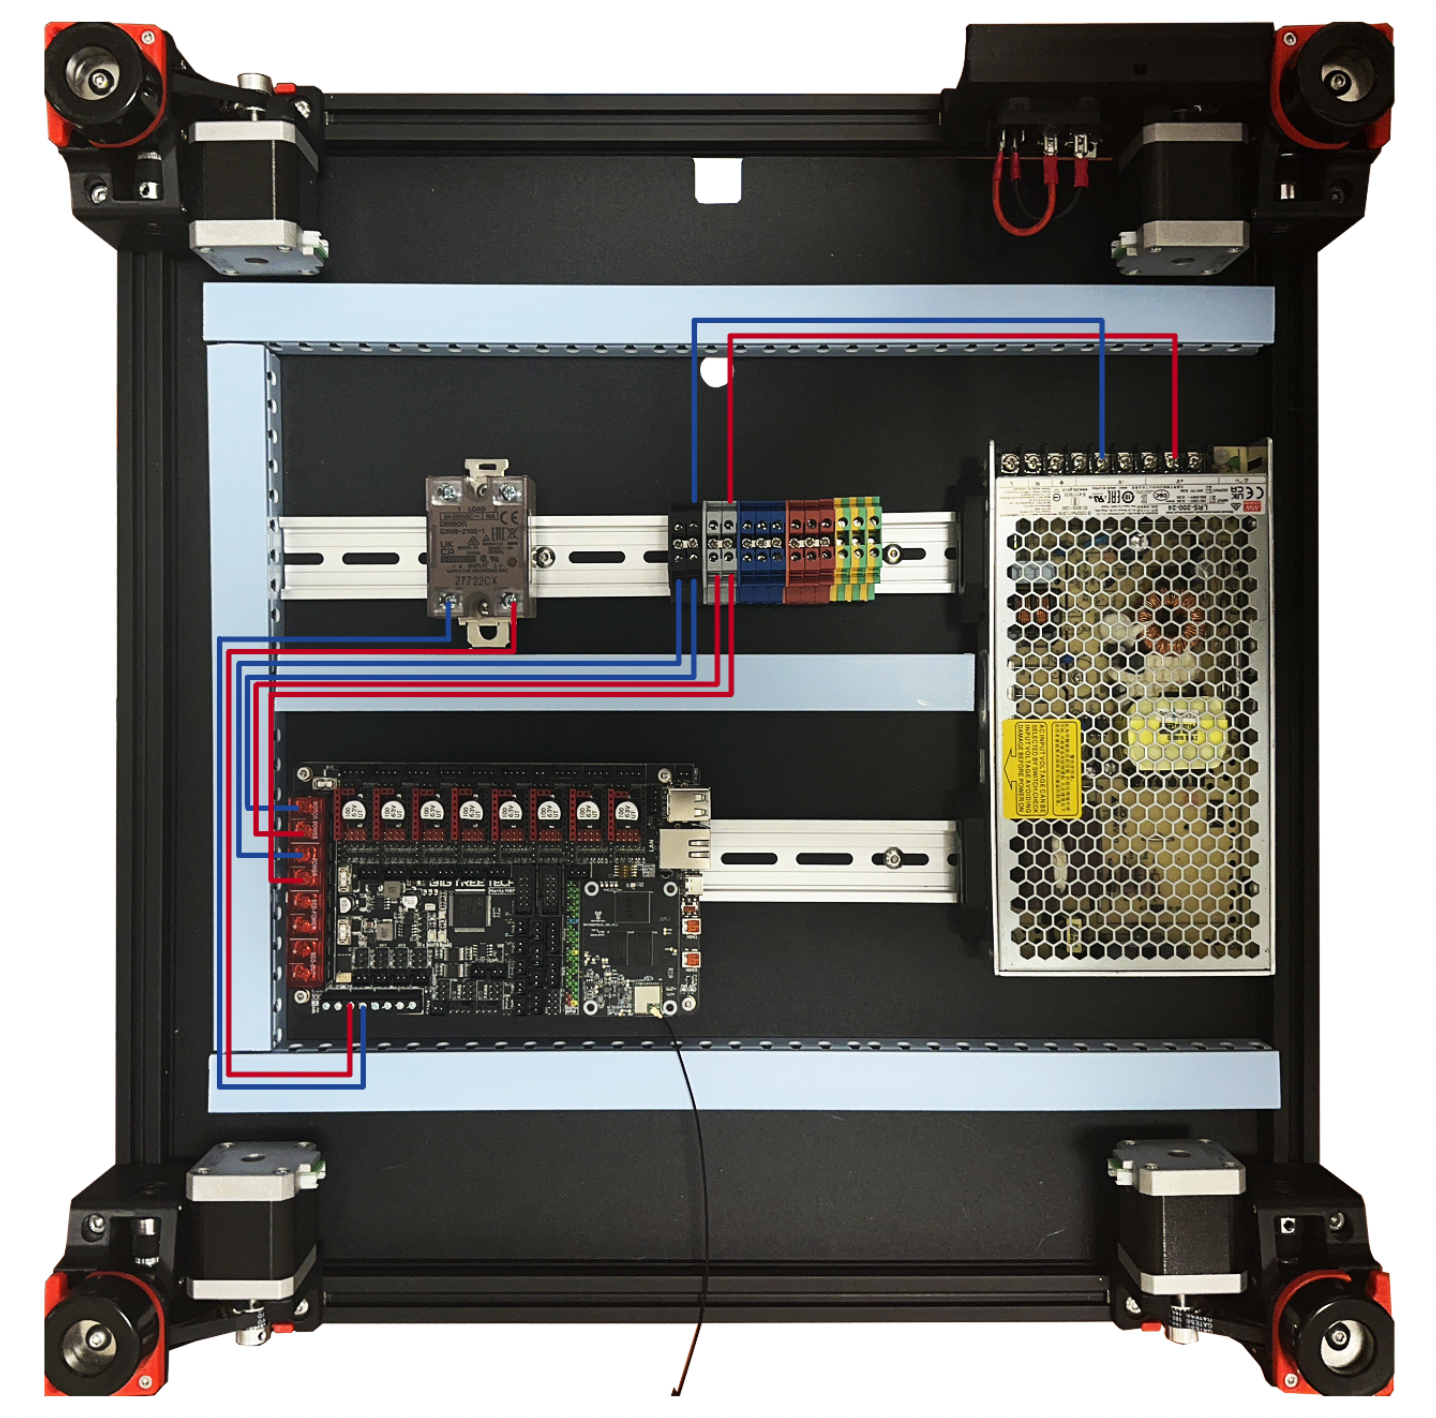
DC Wiring
Complete
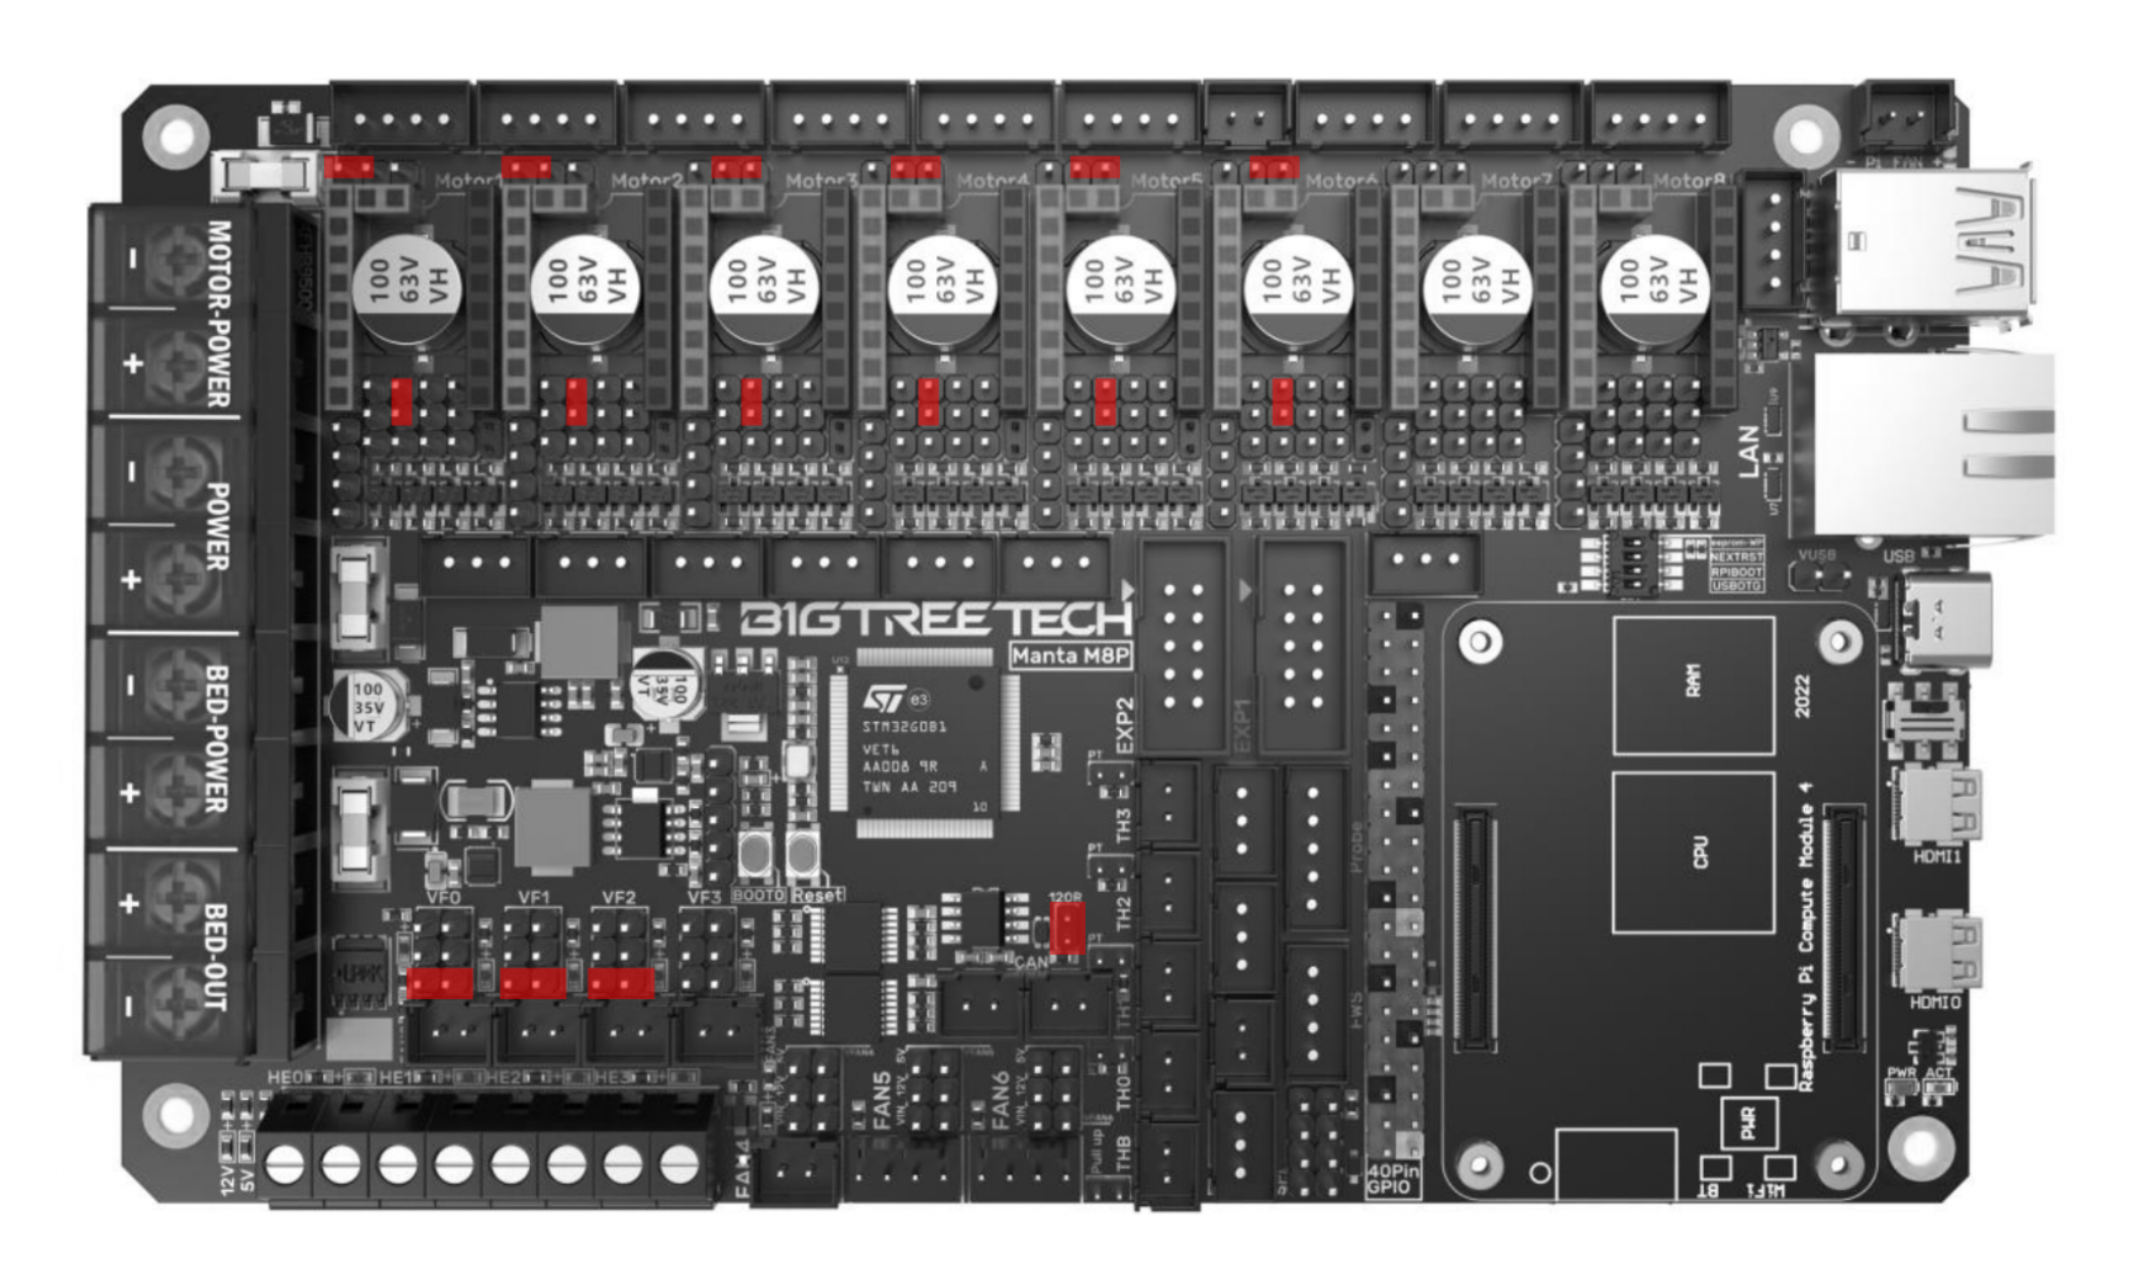
Manta M8P Wiring
Jumpers Setting
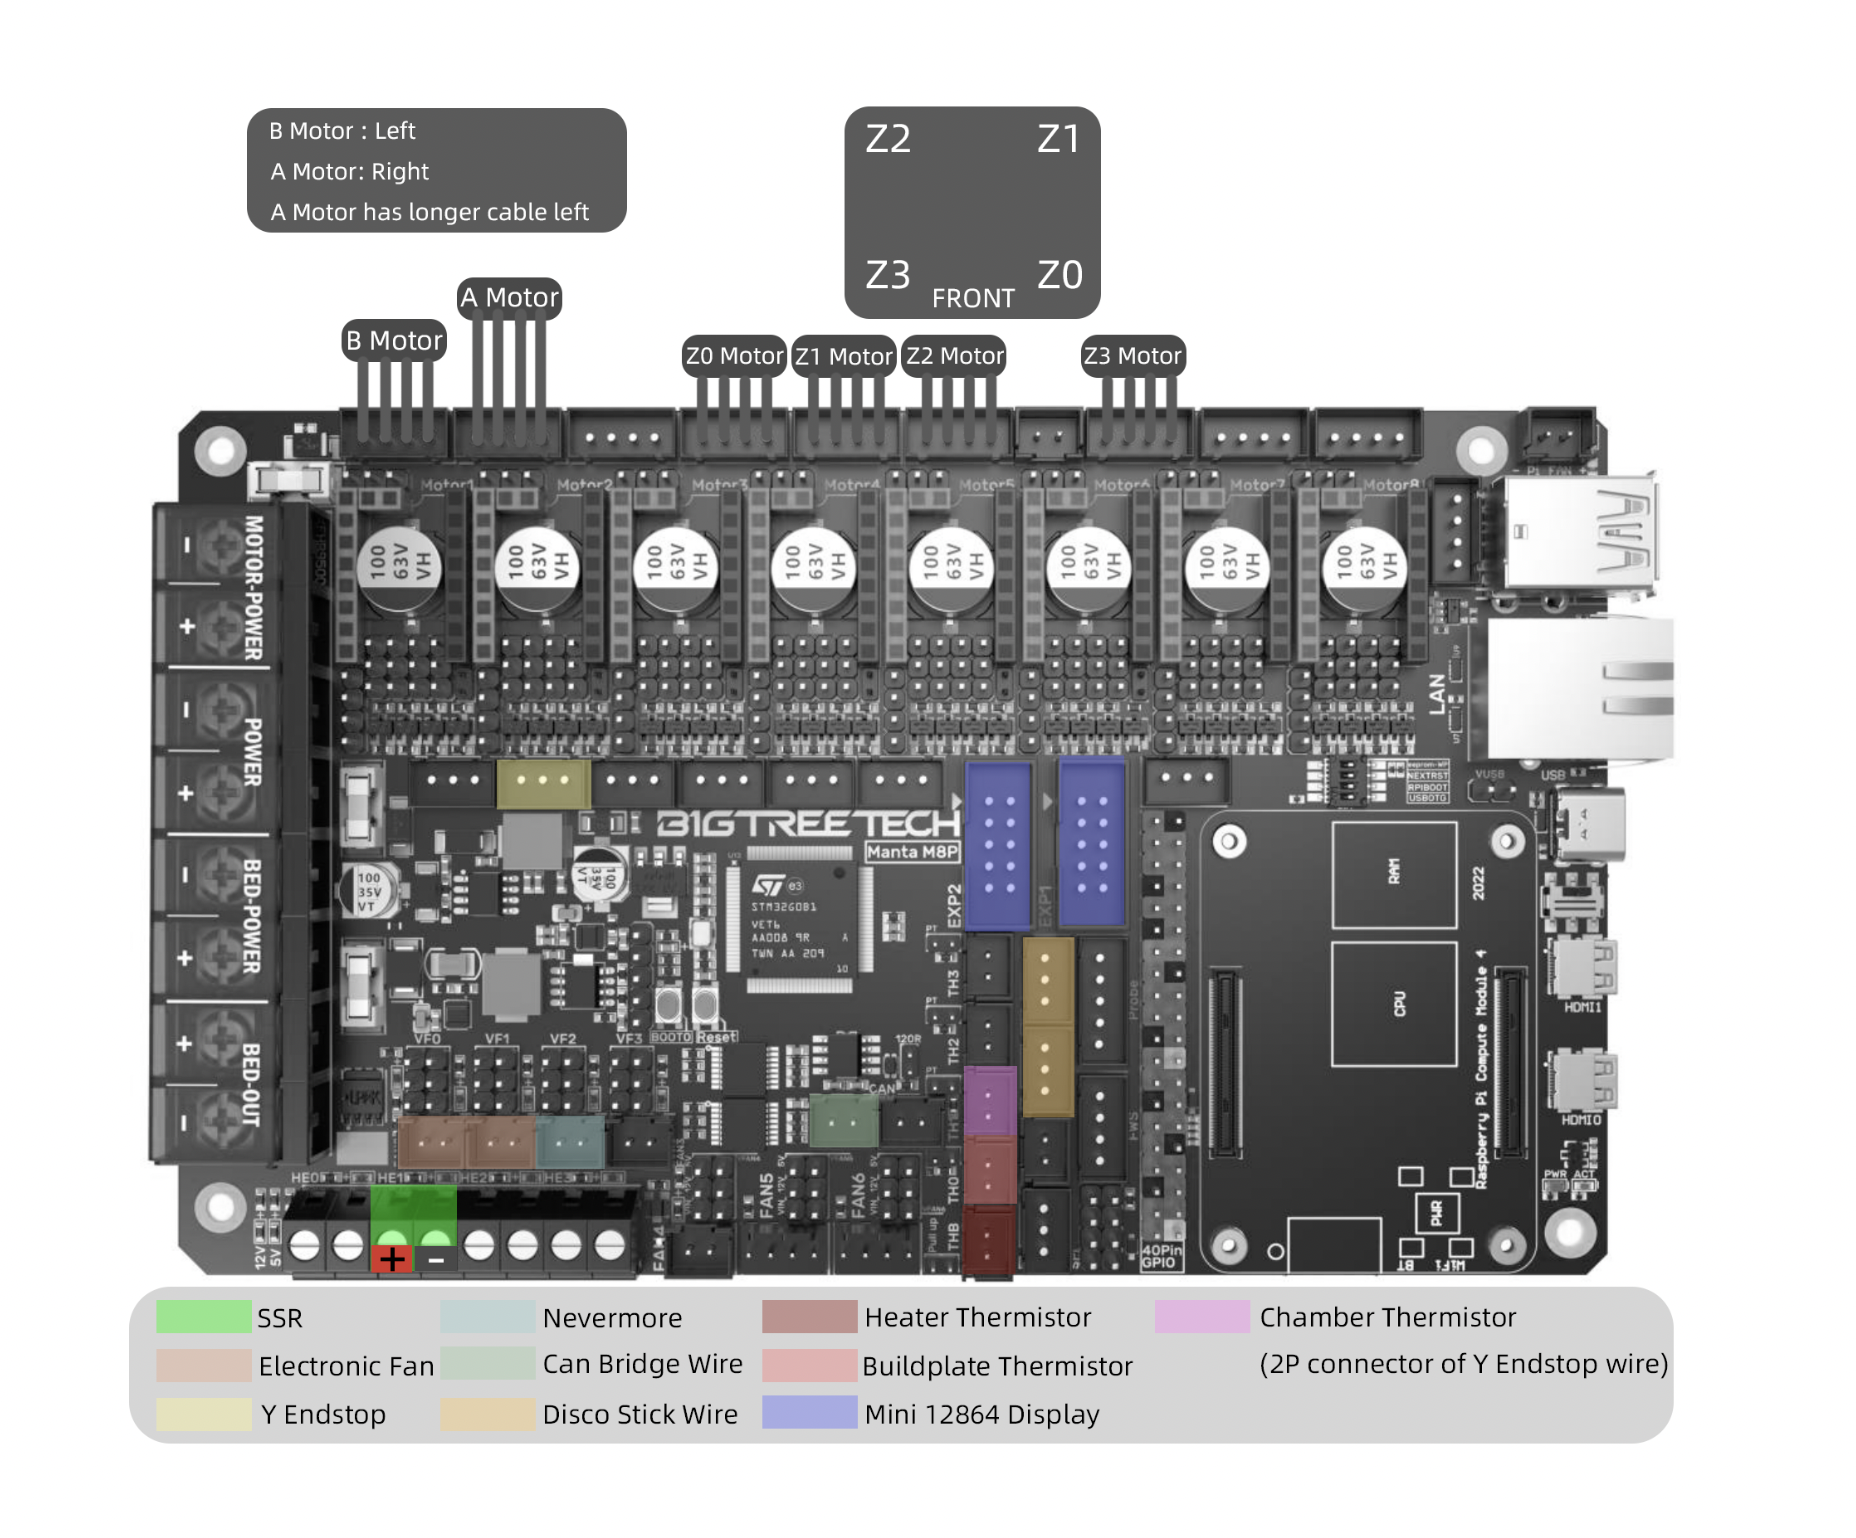
Color Wiring

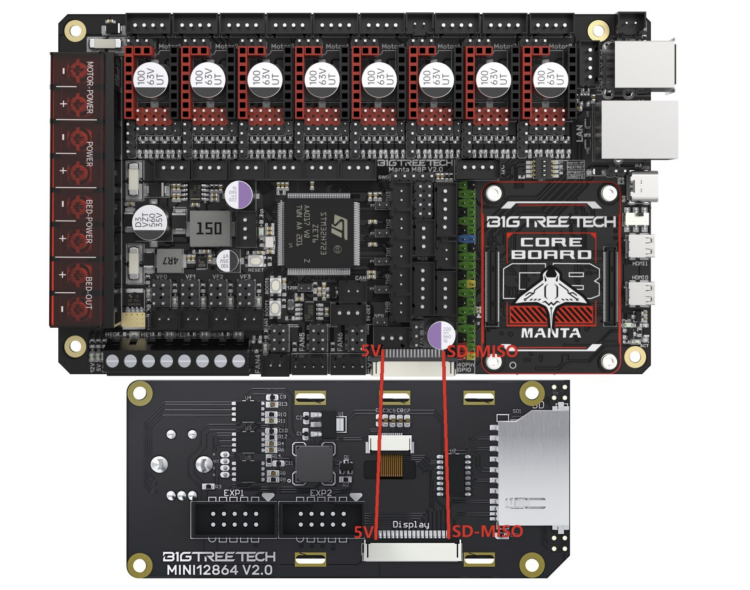
M8P V2 with Mini12864 V2
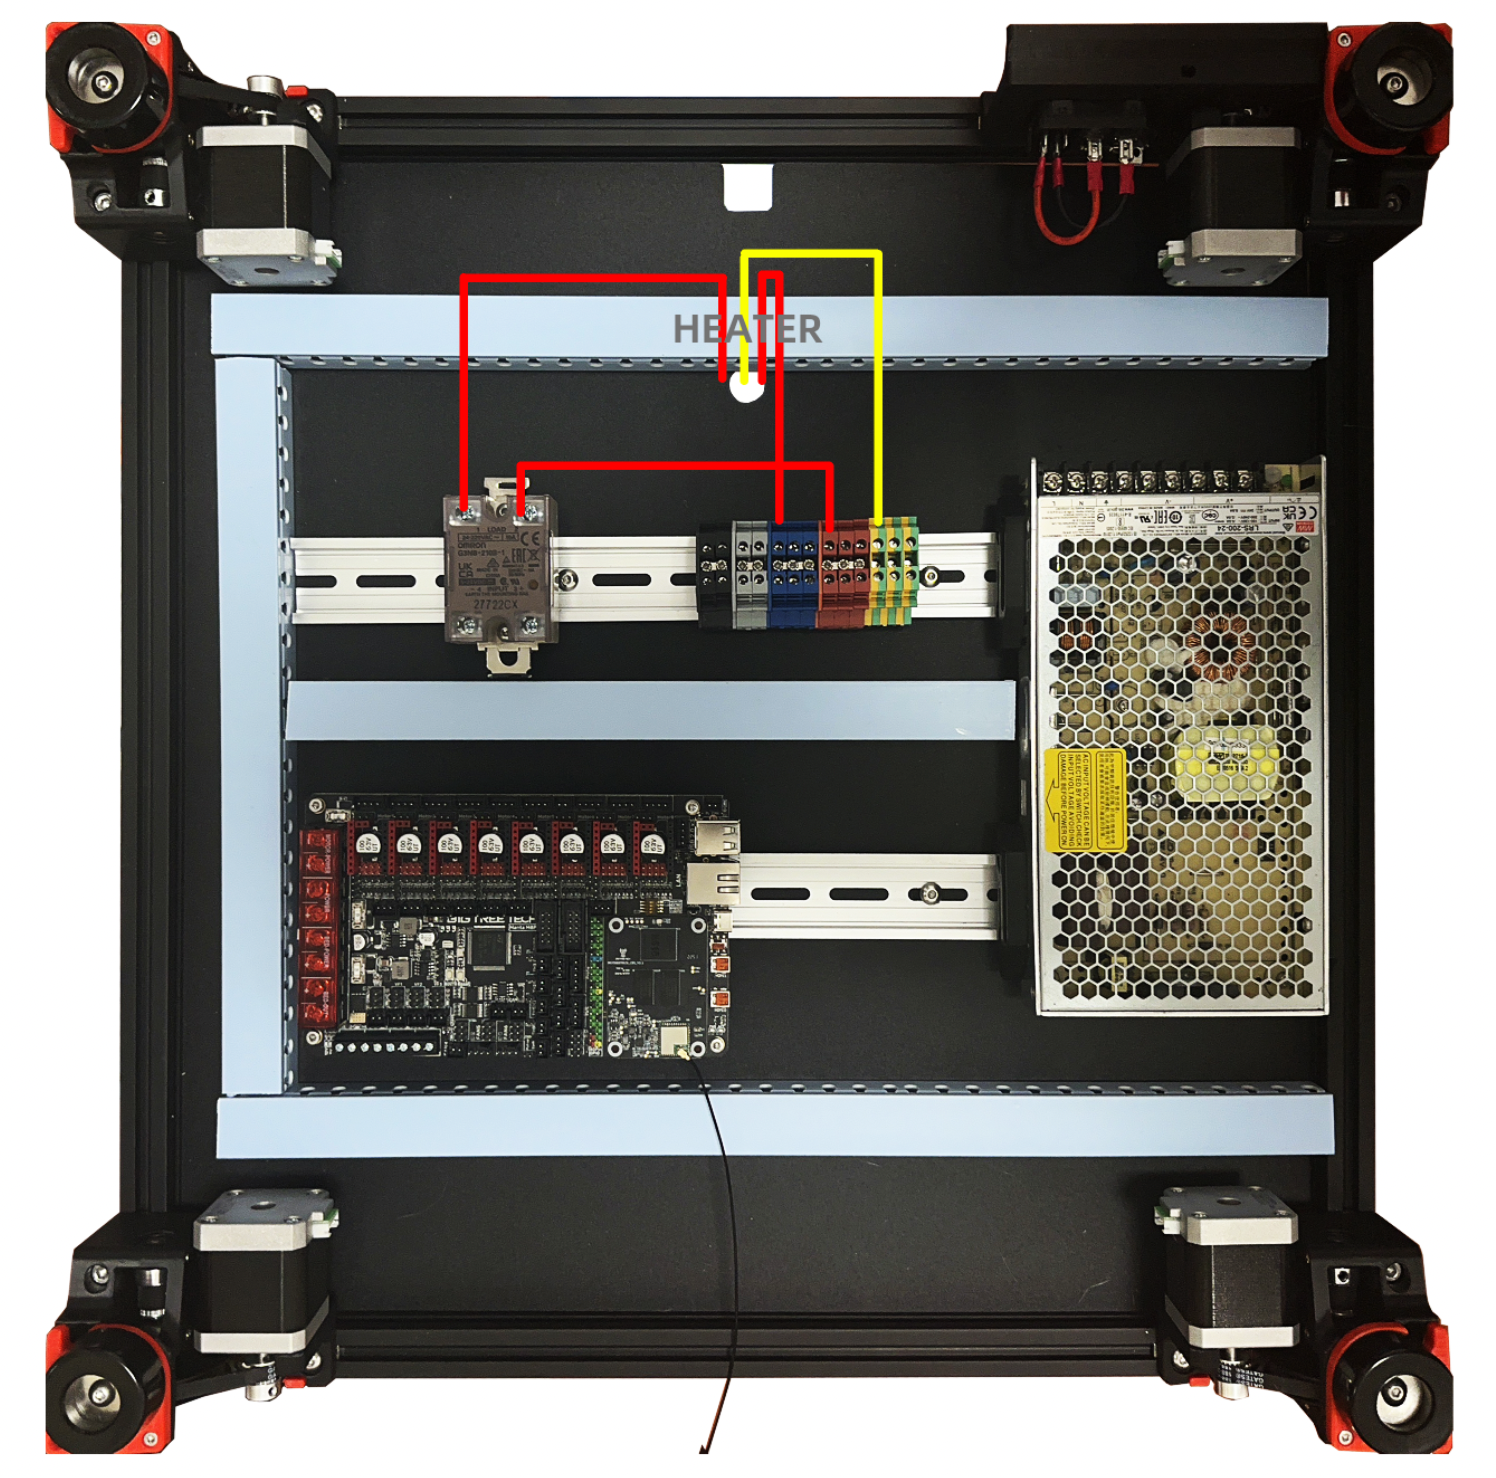
Bed Heater Wiring
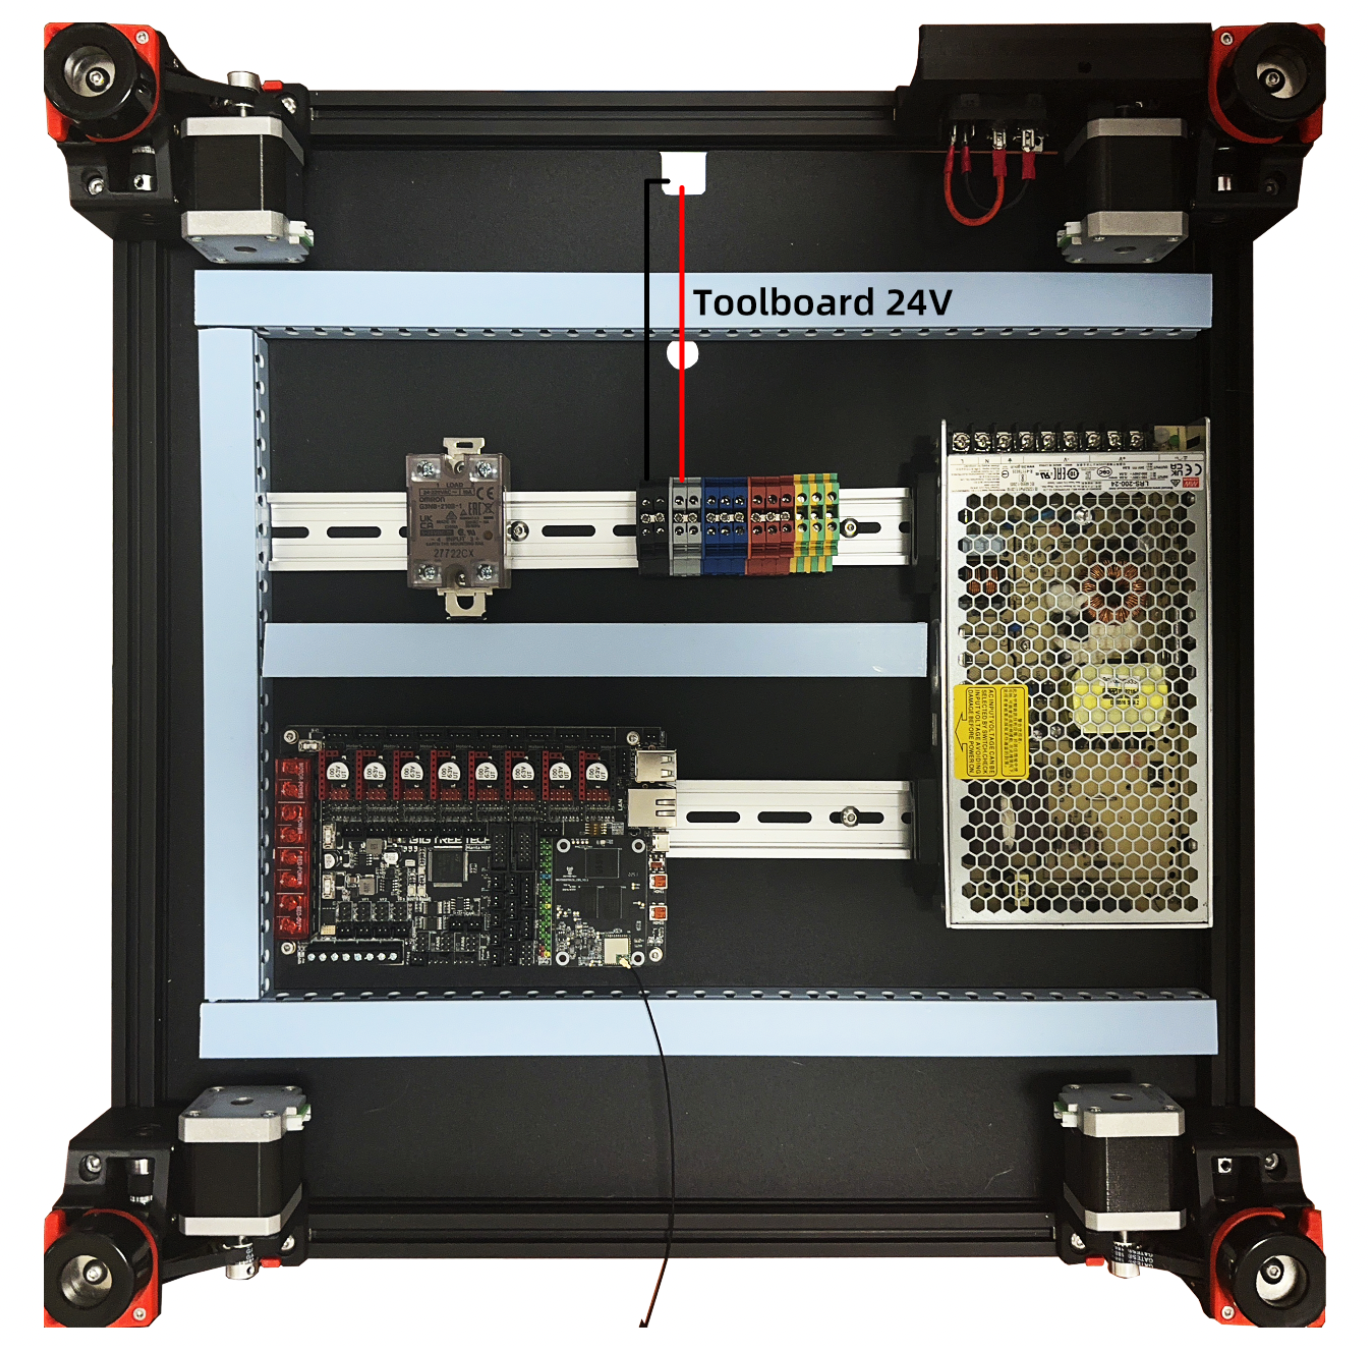
Toolboard 24V wire
The default wires are tinned. Solder cold flows/creeps under load and can become a fire-hazard. You can crimp the connection with a pin terminal or cut them off and use bare wire in the terminal blocks instead.
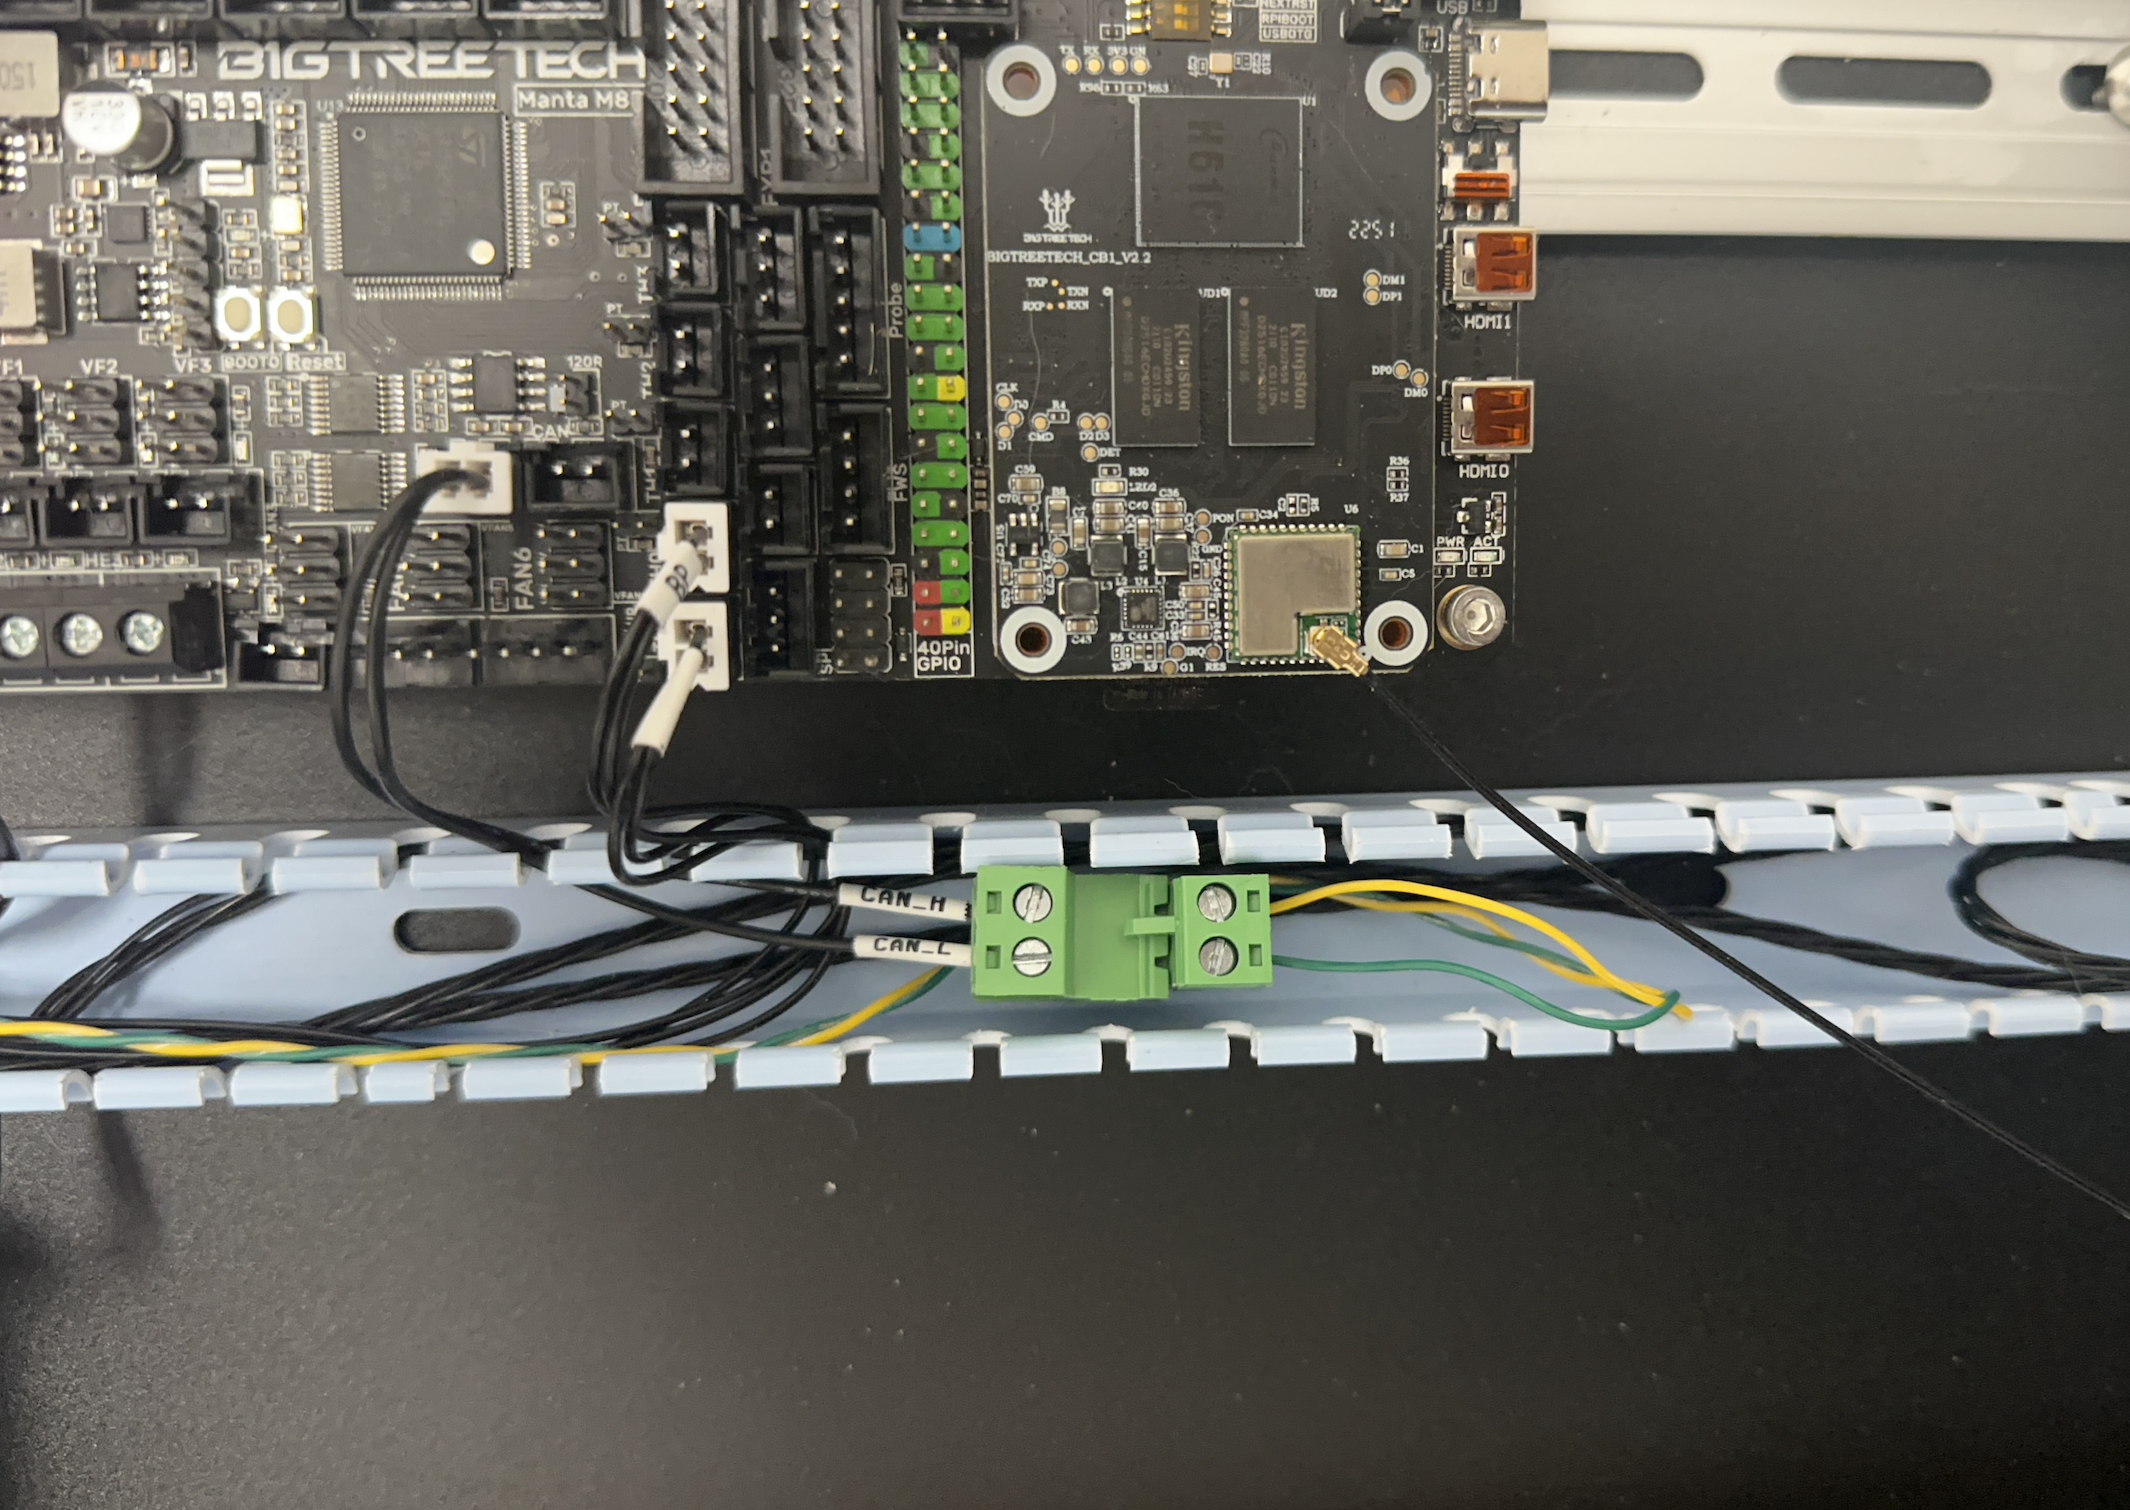
M8P Canbridge Wire
Wiring Complete