General Wiring Guide
This page covers the wiring common to both the V2.4 and the Trident (Stealthburner, Disco LEDs, etc). Please also review the guides specific to your printer, either the V2.4 Wiring Guide or the Trident Wiring Guide.
Before You Start
Make sure the 110V/230V switch on your LRS-200-24 power supply is in the right orientation.
We strongly recommend you flash the M8P/SB2209 before you install them. This usually saves you 2 hours or more of work. Check this page if you have a Manta M8P V2, or this page if you have a Manta M8P V1. Note that the kits have been shipping with V2 since late fall of 2023.
EBB SB2209 Toolhead
Jumpers
There are three jumpers that must be installed on the toolhead: two to select the fan voltage and one to select the 120 ohm resistor that terminates the Canbus.

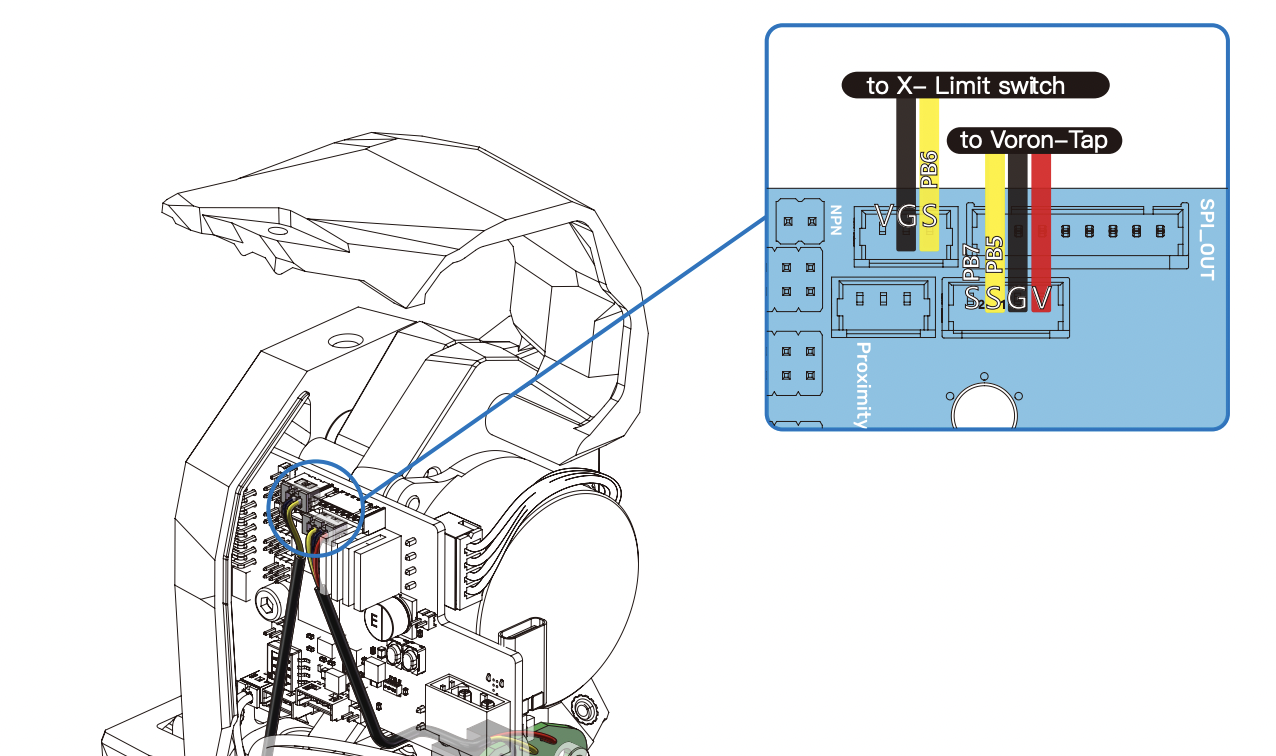
X Endstop & Voron Tap
The X-axis limit switch and Voron Tap plug into the SB2209 as shown. Note that if you elect to use sensorless homing, the limit switch must not be installed.
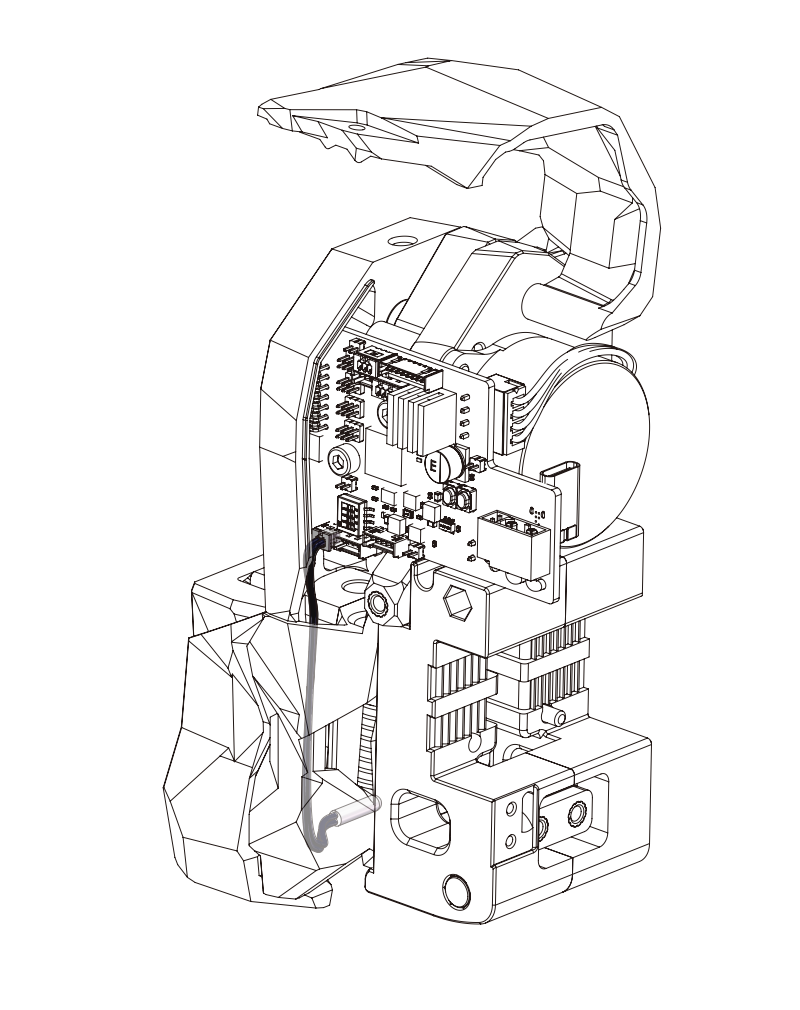
NTC100K
There's some glue on the NTC100K thermistor's connector that may interfere with the CW2. In this case, you can try to remove some glue or cut a small gap there. Note that the NTC100K is not used if you ordered the Rapido hotend since it has its own thermistor built in.
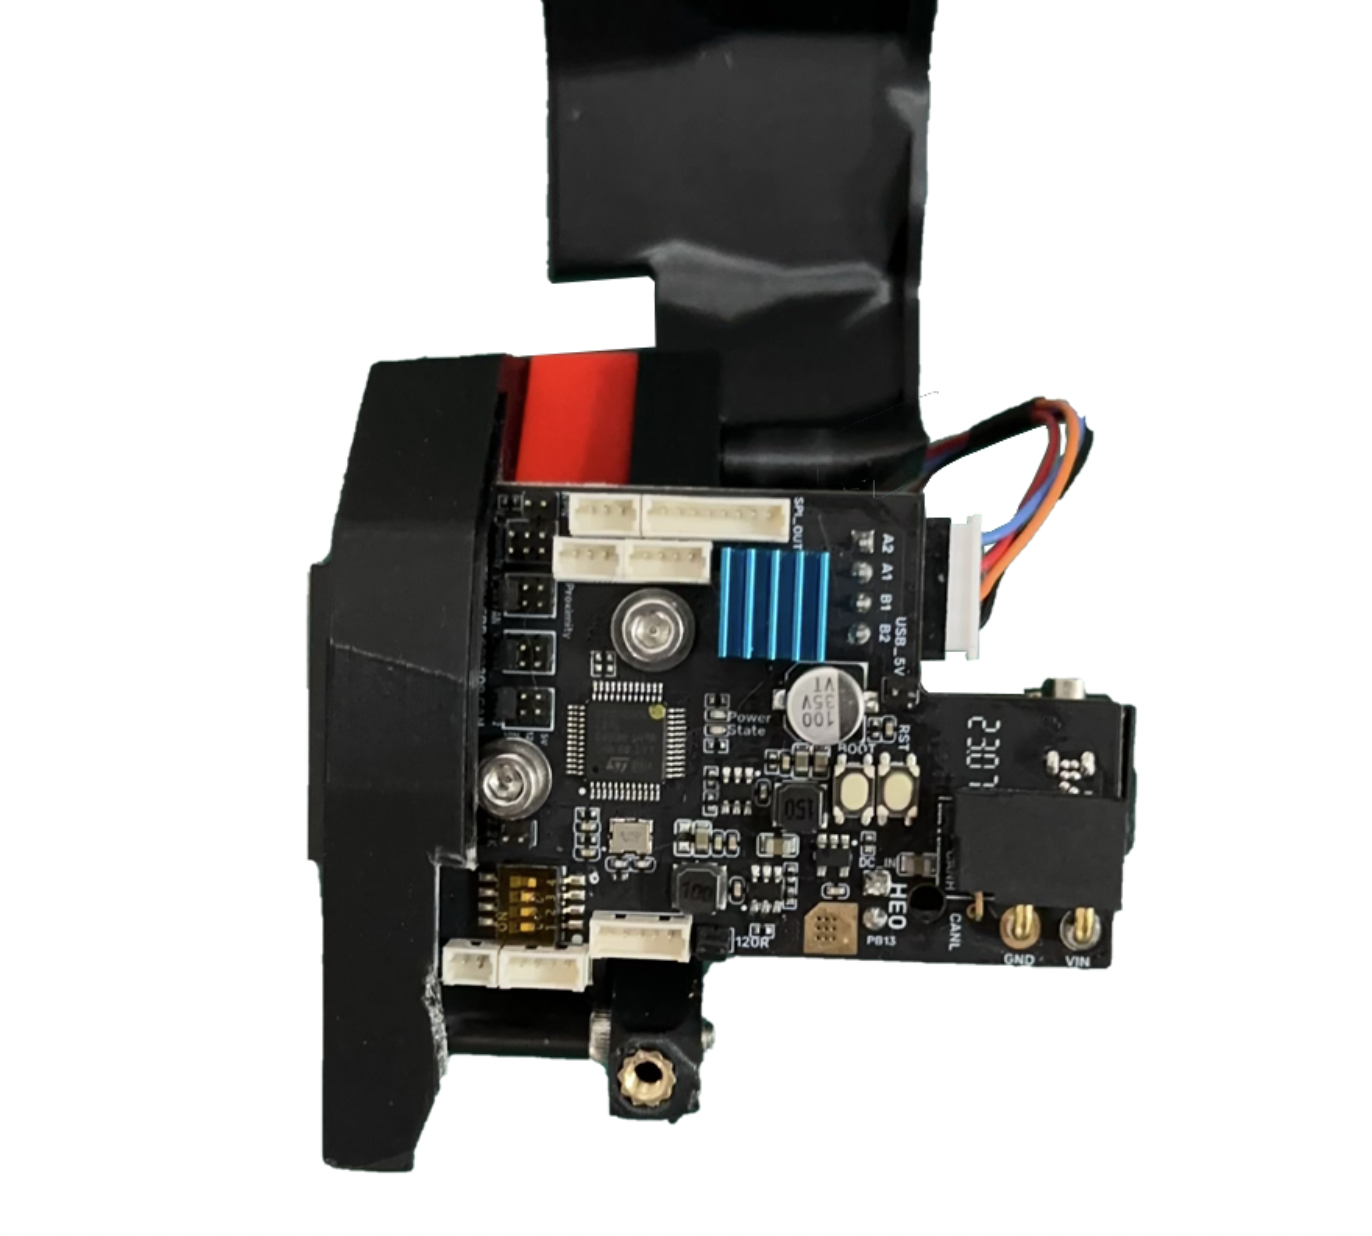
This image shows the SB2209 installed on the body of the Stealthburner. Note that the heatsink is mounted not to the processor but to a bare area of the board near the top-right corner.
Optional Printed Part
BIGTREETECH has a modified CW2 main_body and cable_door printed parts. They can improve the fit of the SB2209 within the Stealthburner.
- BIGTREETECH SB2209 Github STLs (opens in a new tab)
- Cable Cover for PCB V1.2 (opens in a new tab)
- Main Body v1.2 (opens in a new tab)
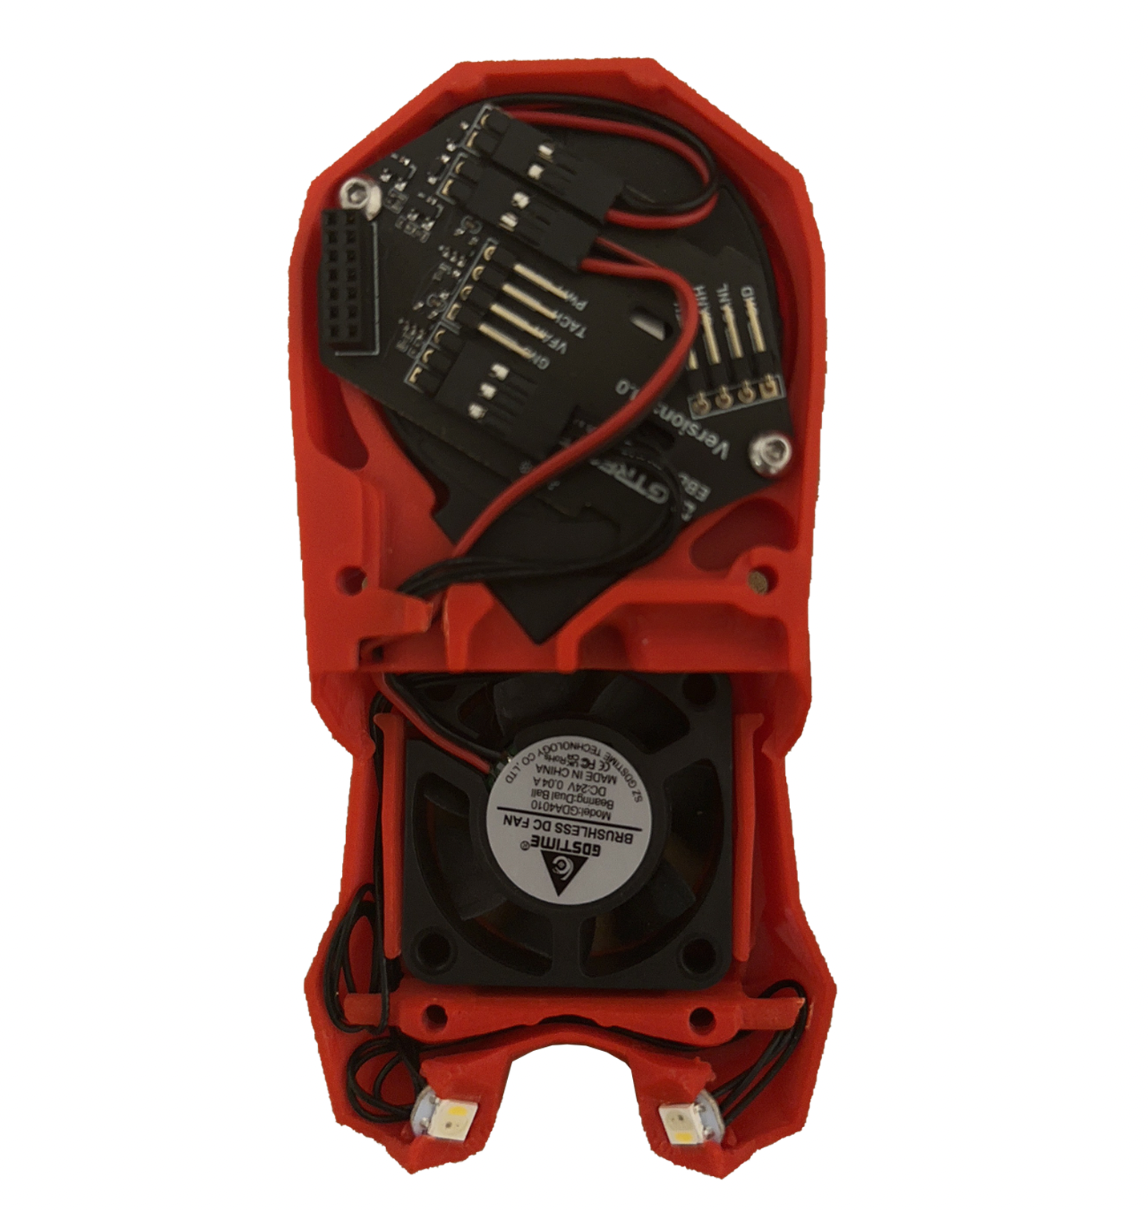
EBB SB0000 Expansion Board
Be extremely careful when plugging the expansion board into the SB2209 Toolhead. It is not difficult to be "off by one" on the 14-pin connector when plugging these two boards together. Doing so will burn out a small level shifter on the expansion board required for the LEDs to work.
The Stealthburner LEDs and both fans plug into the expansion board that in turn plugs into the SB2209 toolhead board. The small holes on the plastic connectors that show the connector face away from the board when the polarity is correct.
(Optional) Disco Wiring
This portion of the wiki only discusses the wiring. The changes you need to make to your printer.cfg file so that the LEDs will be recognized by Klipper are detailed in the Firmware Guide
You need to use the modified Z_belt_cover STL file if your printer is a V2.4. Check our V2.4 Print Guide for details. If you are using the MPX Ultra Z Belt, it also works.
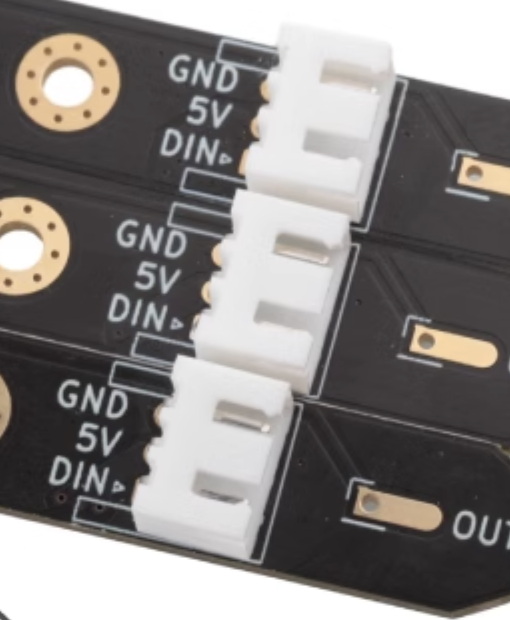
Notice the wire label on the cable of both ends. The cable is directional. The side labeled DIN is the IN port. The cable from the Manta M8P should go in the DIN side.
Be careful here. Connecting the cable from the Manta to the wrong pin on the Disco LEDs, or mixing up the GND and 5V lines can permanently damage the LEDs.
The wiring to the Disco LEDs depends on if you have a Manta V1 or V2. Again, the kits have been shipping with V2 since late fall of 20223.
Disco wiring for Manta M8P V1
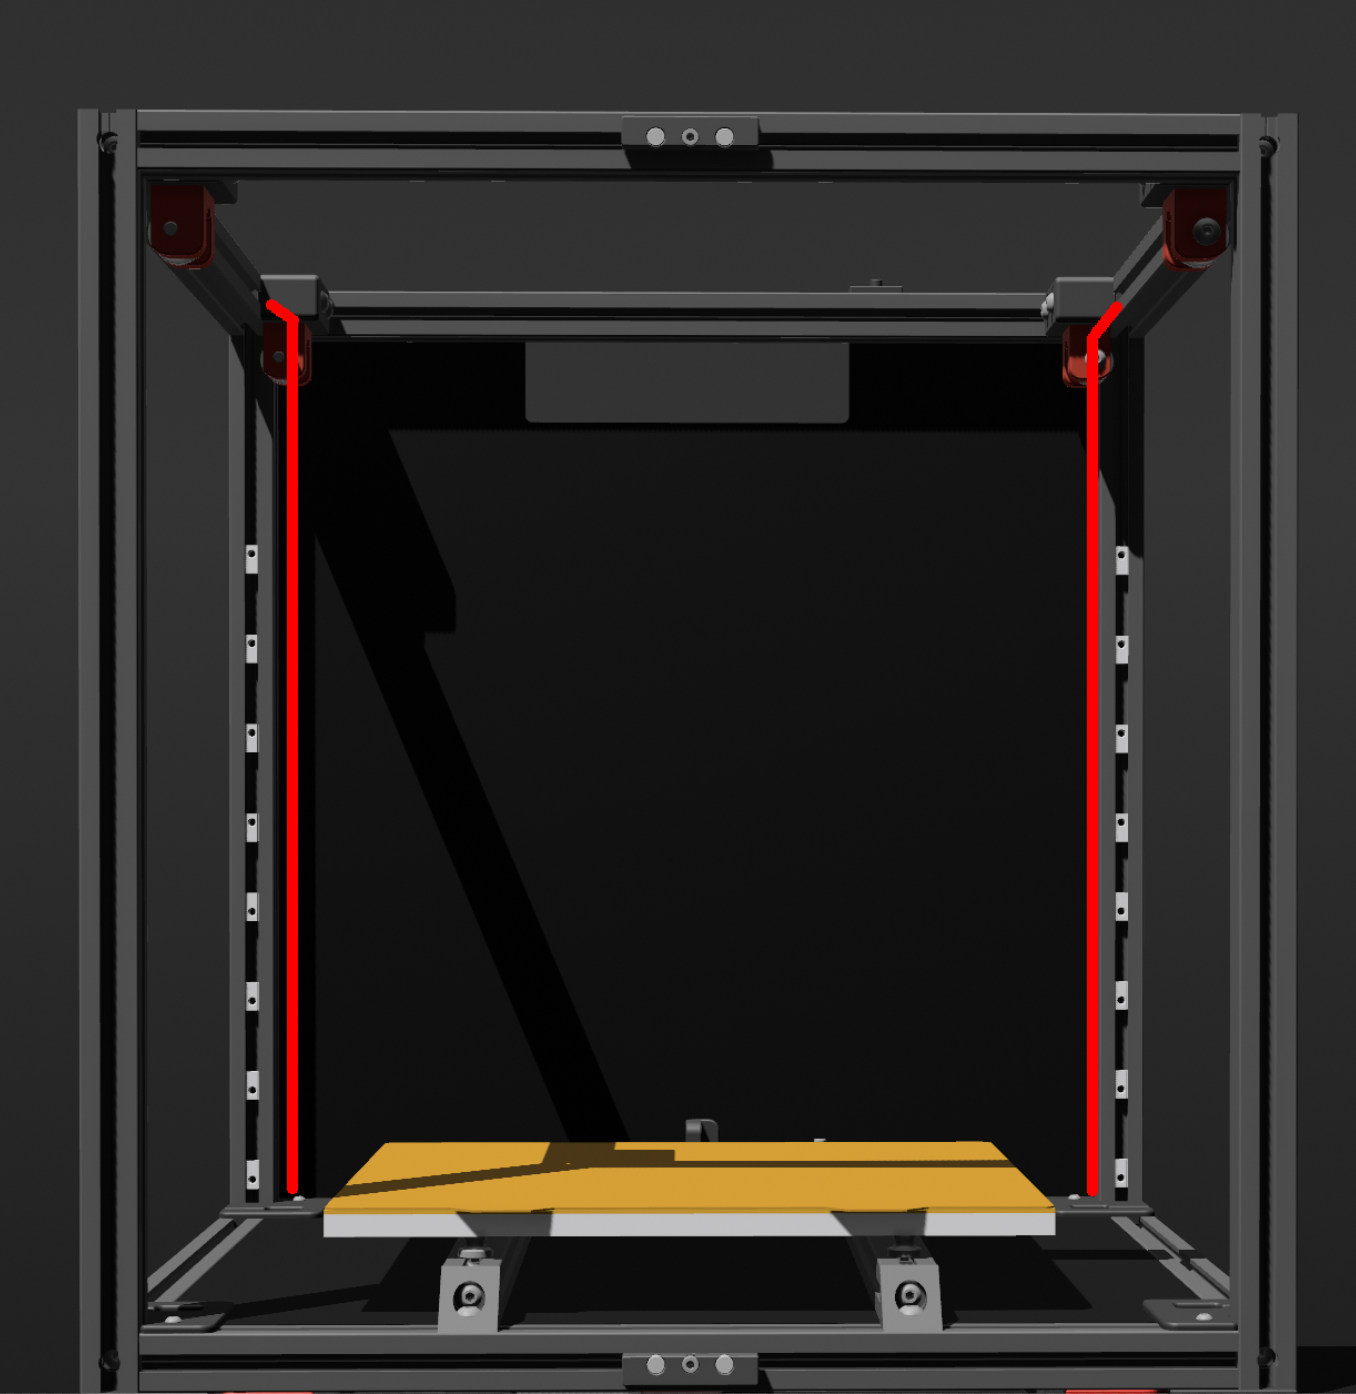
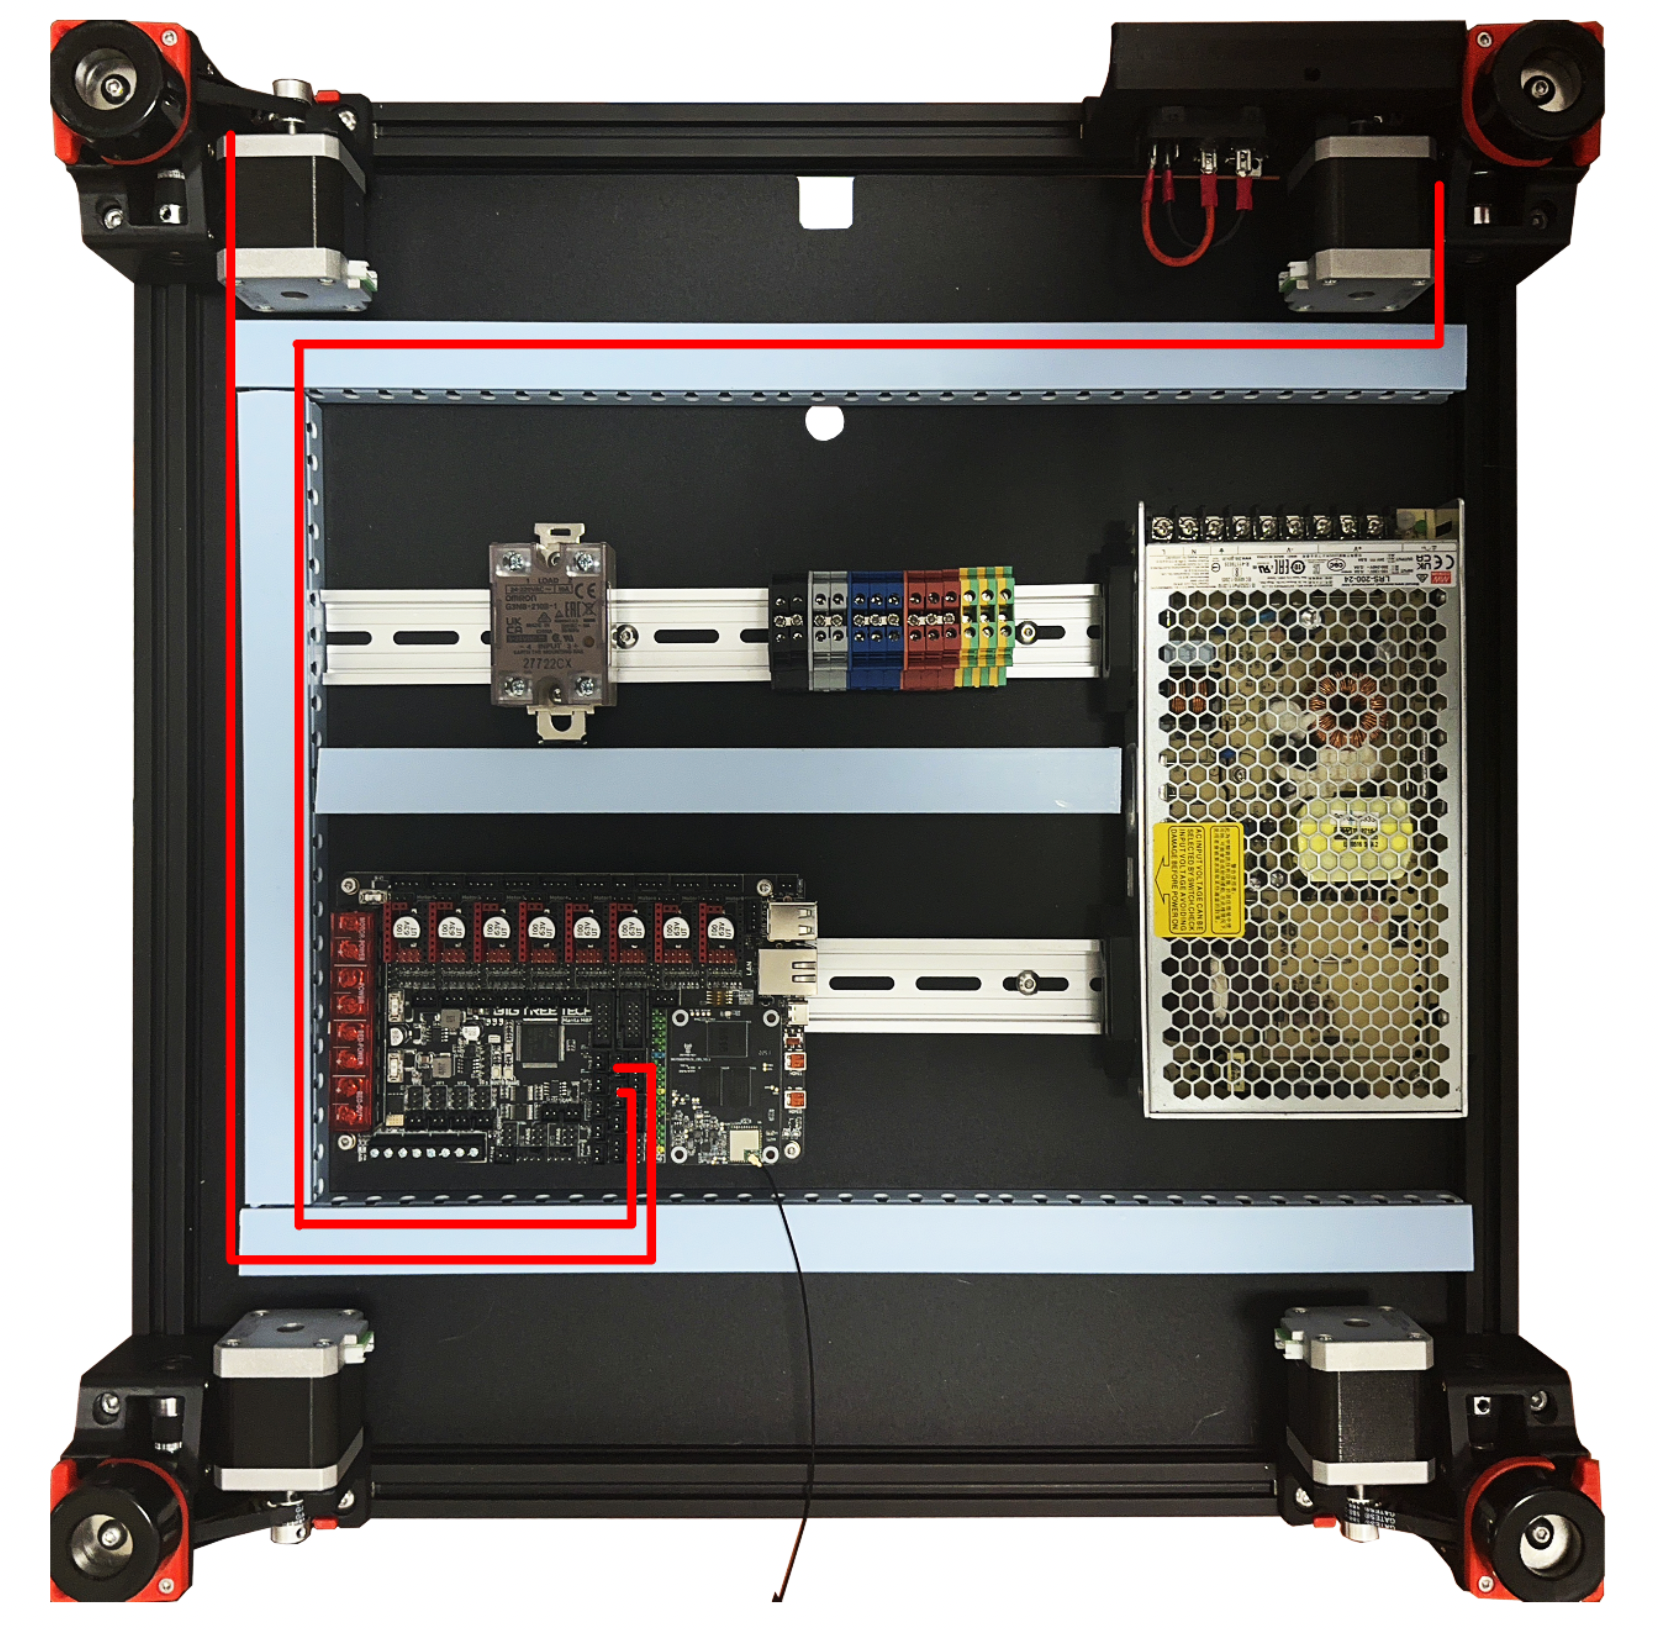
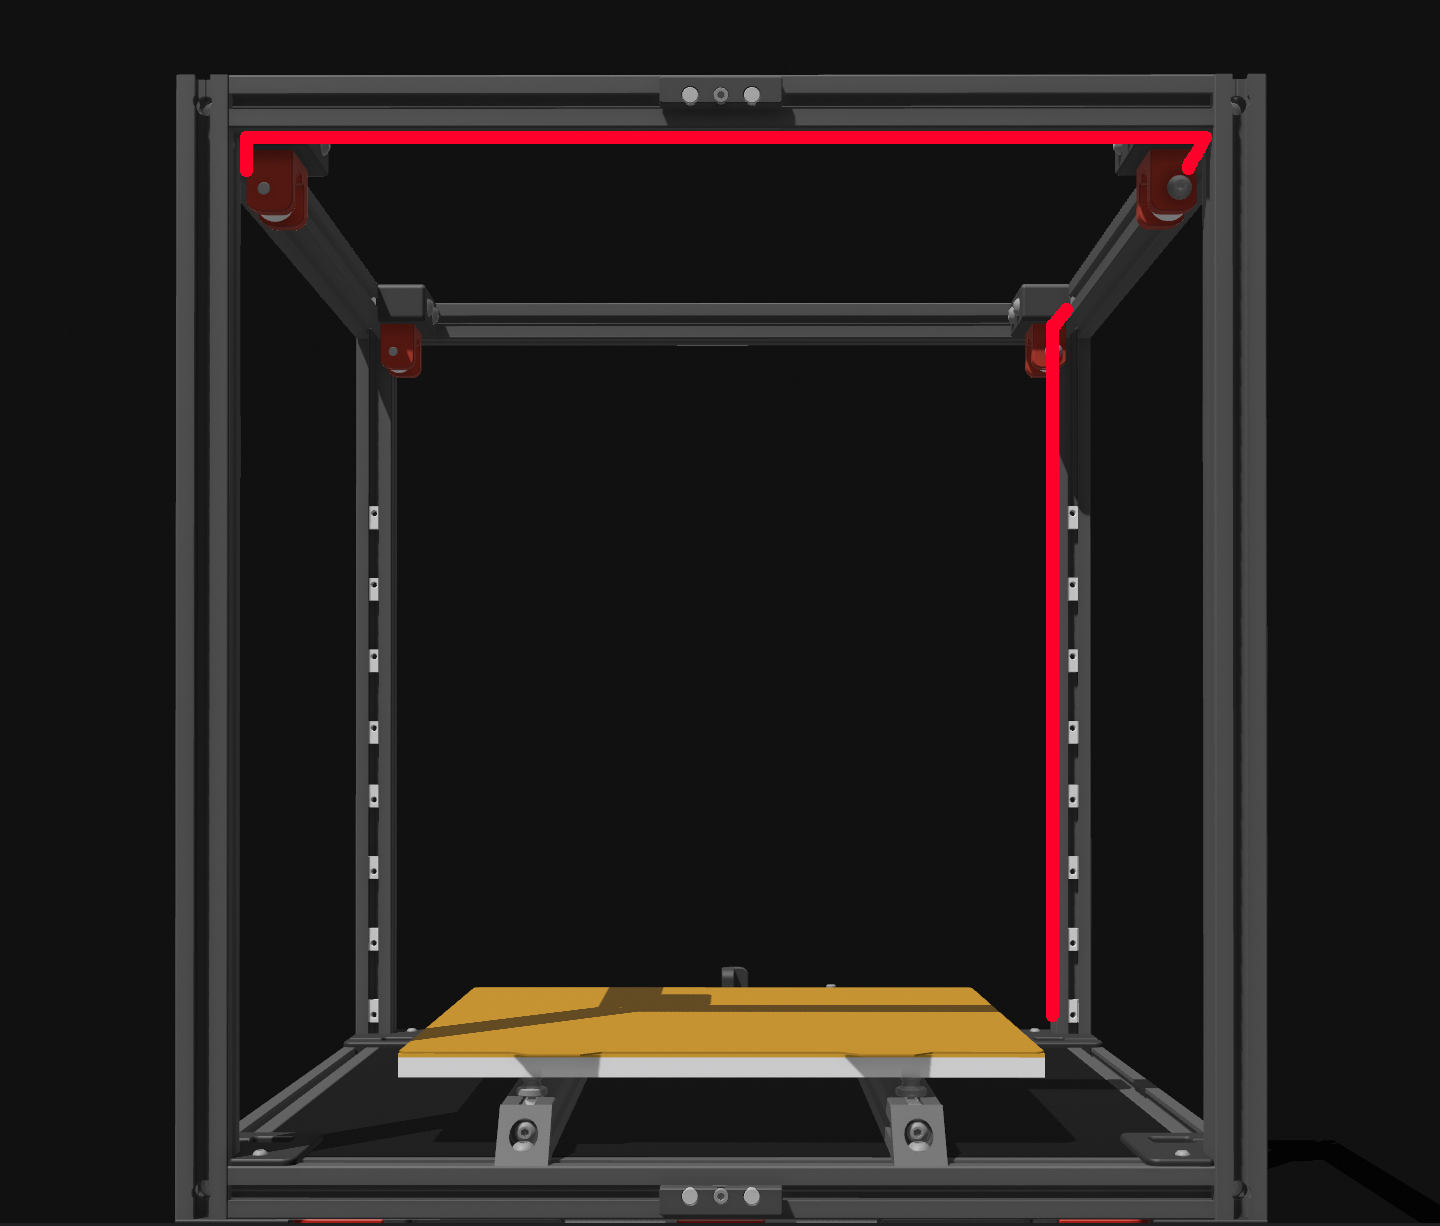
This image shows the wire routing for an M8P V1 on a V2.4 printer. The routing is similar for a Trident. The Manta M8P V1 has two separate ports for controlling each LED stick, so the wiring of the two is separate.
Disco Wiring for Manta M8P V2
If you have the M8P V2.0, you need to connect the Disco in a daisy chain configuration, as M8P V2 only has one RGB port. The long cable from the M8P connects to the DIN side of the first stick. Then another cable connects the DOUT of the first stick to the DIN of the second stick.
Again, getting this wiring wrong can permanently damage the LEDs.
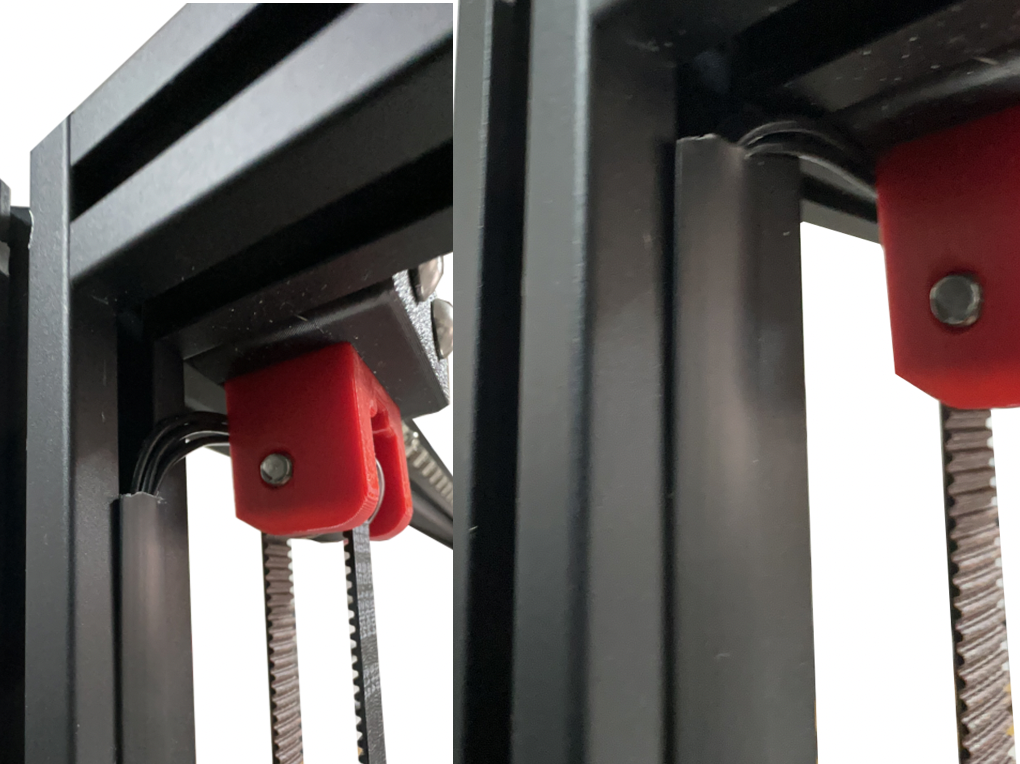
Wiring covers
Use extrusion covers to hide the wires to the Disco sticks. They can also be used to hide the gantry stepper wires.